Did you know that February 27th is Polar Bear Day?
To celebrate it and raise awareness about the conservation of this beautiful species, we decided to make this paper plate polar bear craft!
It is a wonderful way to start the conversation about these creatures and get your kids interested in knowing more about them and how we can help protect them.
It is also a fantastic craft to include in your winter-themed lesson plans, as well as in your Arctic or habitat studies.
This fun polar bear craft is perfect for preschoolers and kindergarteners who are practicing their cutting skills and want to learn more about the fantastic polar bears.
The best part is that this activity is very inexpensive and mess-free.
Since regular paper plates are already white, you don’t have to worry about painting them. There couldn’t be an easier winter craft!
Ready to make this beary cute bear?
Let me show you how!
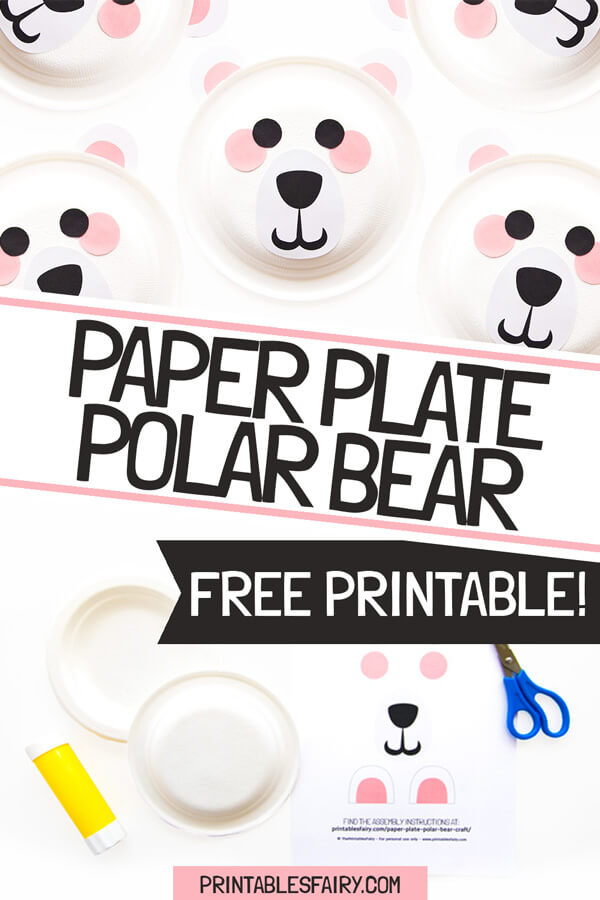
How To Make A Paper Plate Polar Bear Craft
In this post, I’ll first show you the very few materials you need to make your polar bear paper plate craft. (I’m sure you already have them at home 😉)
Then, you can find the step-by-step instructions to assemble your polar bear, along with a video tutorial where you can see it in detail.
After that, you can download the free printable polar bear template to recreate this simple craft with your kids.
And finally, I highly encourage you to visit this website and participate in this special day by learning about polar bears and joining a community committed to protecting them.
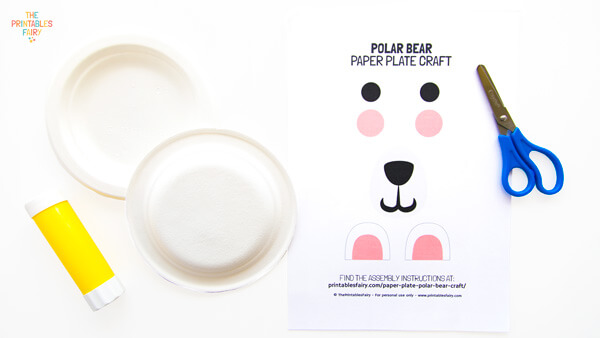
Materials
- Polar Bear Paper Plate Template (download it at the bottom of this post)
- White cardstock and printer
- White Paper Plate (we used a small one)
- Scissors
- Glue stick
Instructions
- Download the polar bear template at the end of this post and print it on white cardstock. Then, cut out all the pieces.
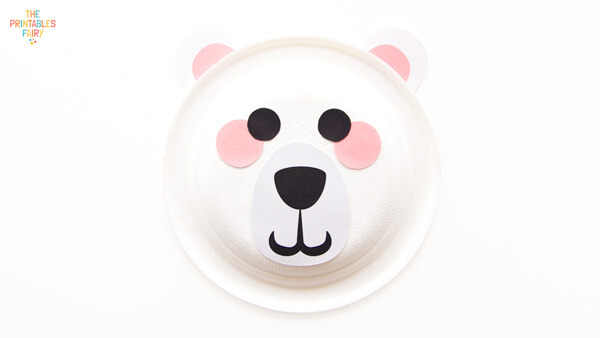
- Start by flipping over your white paper plate.
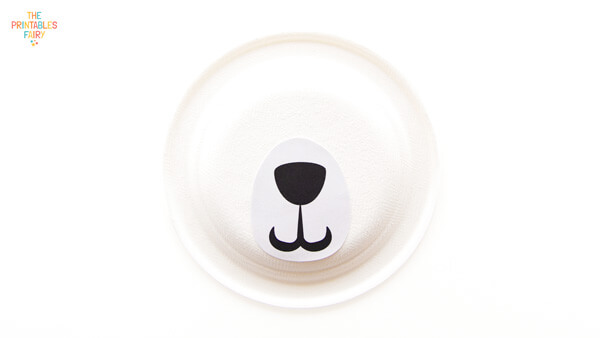
- Glue the snout in the bottom center of the paper plate.
- Stick the pink cheeks above the snout. One at each side.
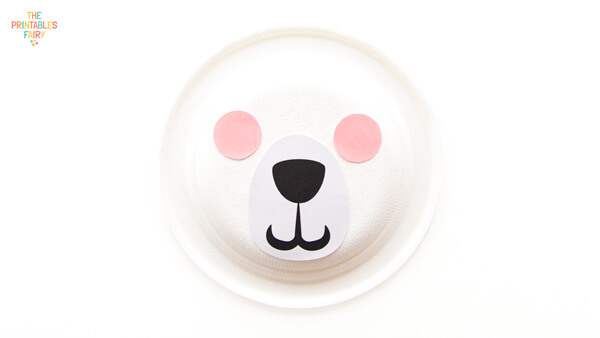
- Glue the eyes above the cheeks as shown below.
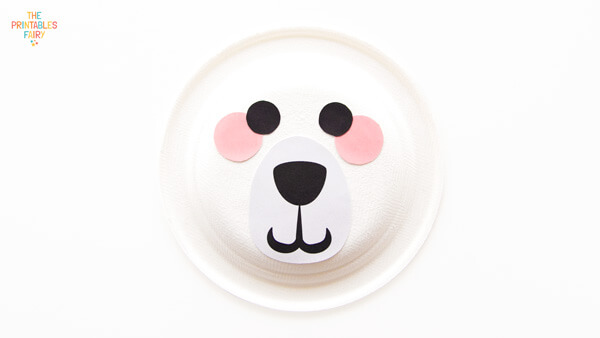
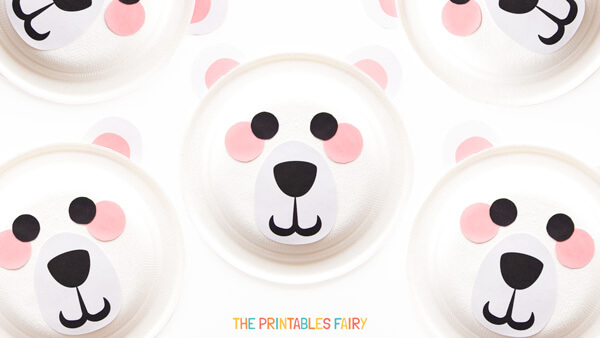
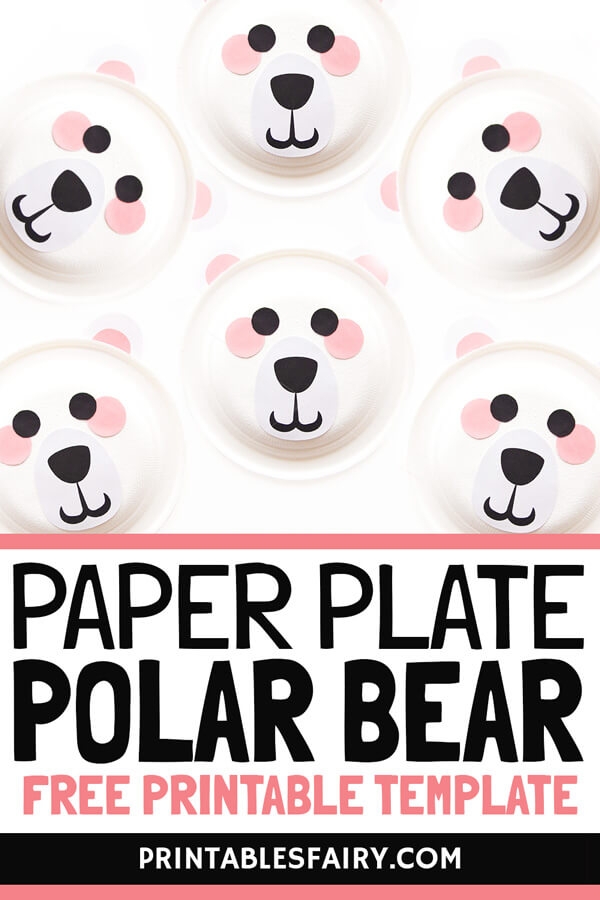
- Finally, glue the ears behind the paper plate.
Your polar bears are ready to go to the Arctic!
Or, you can simply hang them from the ceiling to decorate your home or classroom.
Video Tutorial
If the instructions above were not enough, watch this video tutorial to see how I made this easy polar bear craft.
You can also save it on Youtube for later!
Paper Plate Polar Bear Template
As with all of our paper plate crafts, I have included two versions of the polar bear template.
The first one is ideal for 6 inches paper plates, while the second one is better for 10 inches plates.
So, check the size of your own paper plate before printing and select the template that fits it better.
To download these templates, click the link below and start crafting!
GET THE POLAR BEAR PAPER PLATE TEMPLATE
*Please remember that these printables are for personal use only. You may not sell or distribute the files. If you want to share them, please link to this post and not directly to the PDF files.
More Winter Activities