This 3D Christmas tree is a simple paper craft to make with your kids and build holiday memories.
If each one of your children wants to have their own Christmas tree, this easy craft can make that possible!
The best part is that it requires very few supplies and craftiness skills, which makes it the perfect project for kids of all ages.
It is so easy that you can make it as a classroom craft, or do it at home as a family activity and use the final products as homemade decorations.
Your kids will be so proud!
Use the free printable Christmas tree template available at the end of this post to make this origami craft even easier.
Time to fold!
Keep reading this post to learn how to make your own three-dimensional Christmas tree super easily.
3D Paper Christmas Tree
To complete this DIY Christmas craft, watch the video below.
Or take a look at the step-by-step picture instructions right under it.
Supplies
To make your 3D paper Christmas Tree, you will only need a couple of materials:
- Scissors
- Ruler
- Regular paper & printer
- 3D Christmas Tree Craft Template, or
- Colored paper
How do you make a 3D Christmas tree
- Print the free Christmas tree template on regular paper and cut the squares.
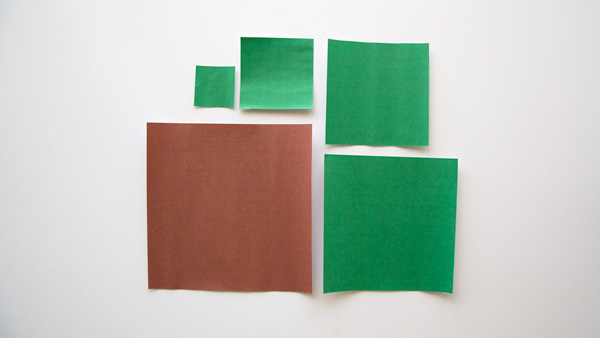
Alternatively, you can also make your own paper squares.
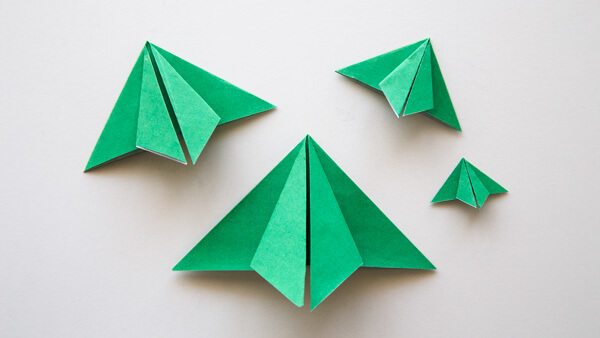
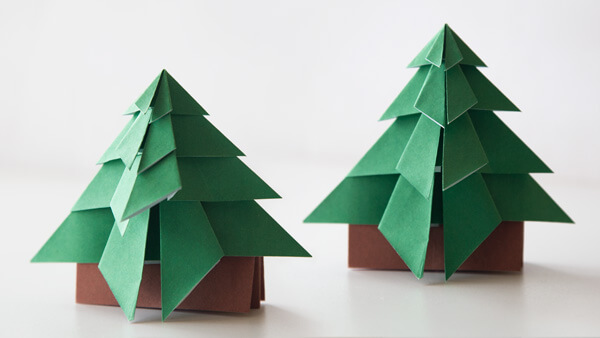
For the crown, we used 4 green squares of the following sizes:
- 2.4 x 2.4 cm – 1 x 1 in
- 5 x 5 cm – 2 x 2 in
- 7.6 x 7.6 cm – 3 x 3 in
- 10.2 x 10.2 cm – 4 x 4 in
For the trunk, we used 1 brown square size 12.8 x 12.8 cm – 5 x 5 in.
Don’t hesitate to use different sizes if you want to make bigger trees. Just keep in mind to always make squares or the folding technique won’t work.
You can also use papers of different colors to make unique trees.
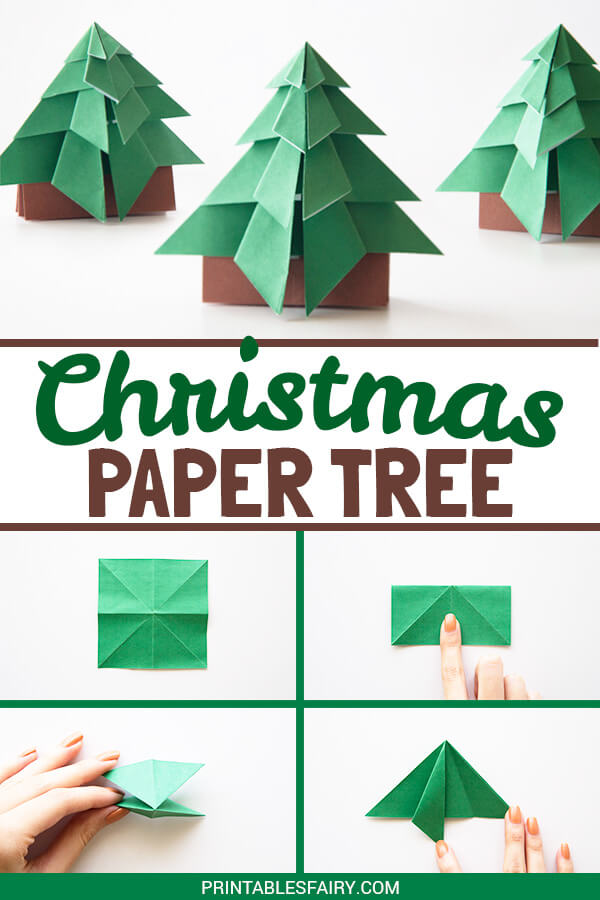
- Take one green square and fold it diagonally to make a bending line.
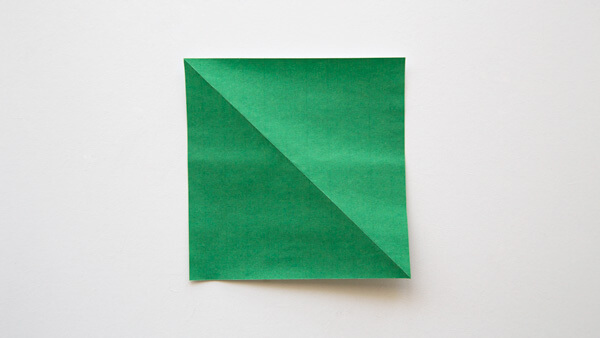
- Open the square and fold it diagonally in the opposite direction.
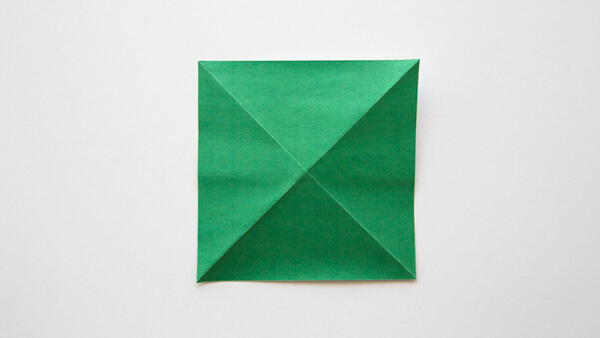
- Unfold the square and fold vertically.
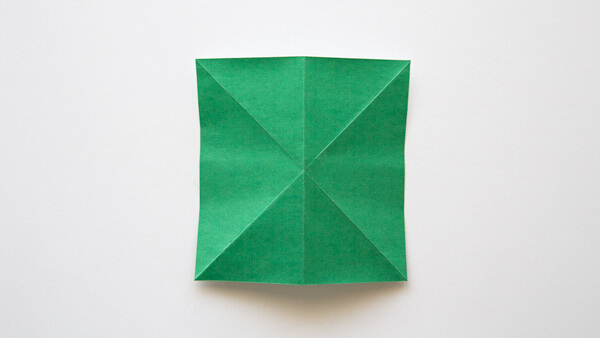
- Unfold once more and fold horizontally to make a rectangle.
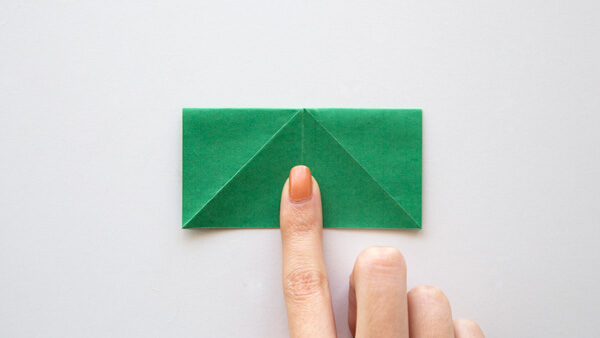
- Push in the left and right sides to make a triangle.

- Take the left corner and bring it to the middle, as shown below.
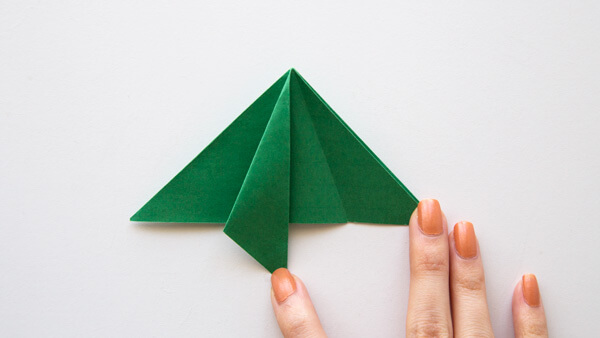
- Repeat on the other side.
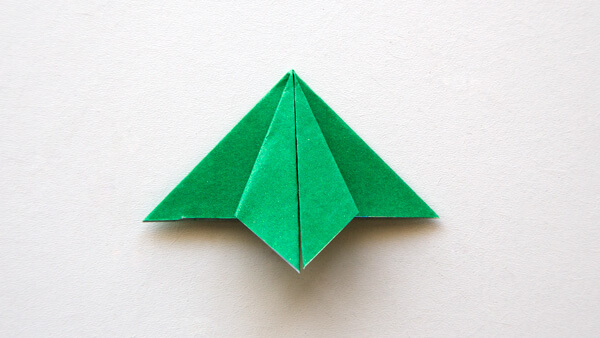
- Fold the other 3 squares following the steps above.
- To make the trunk, take the brown square and fold it as shown on steps 2 to 6.

- Fold the right and left corners to the middle on both sides of the triangle.

- Unfold the corners and fold them inwards, as shown below.

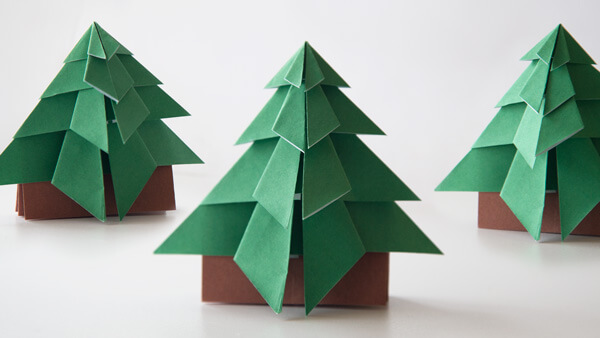
- Now that you have all the pieces, stack them up from small to big.
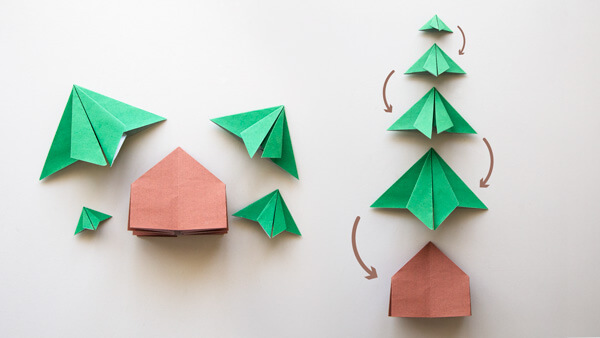
These Christmas trees are ready to decorate your home.
You can glue the pieces together if you are planning to use these trees as ornaments.
Now that you have your Christmas trees, you could prompt your kids to decorate them with stickers, sequins, paper ornaments, small pom poms, or ribbons.
Let your children be as creative and imaginative as they want!
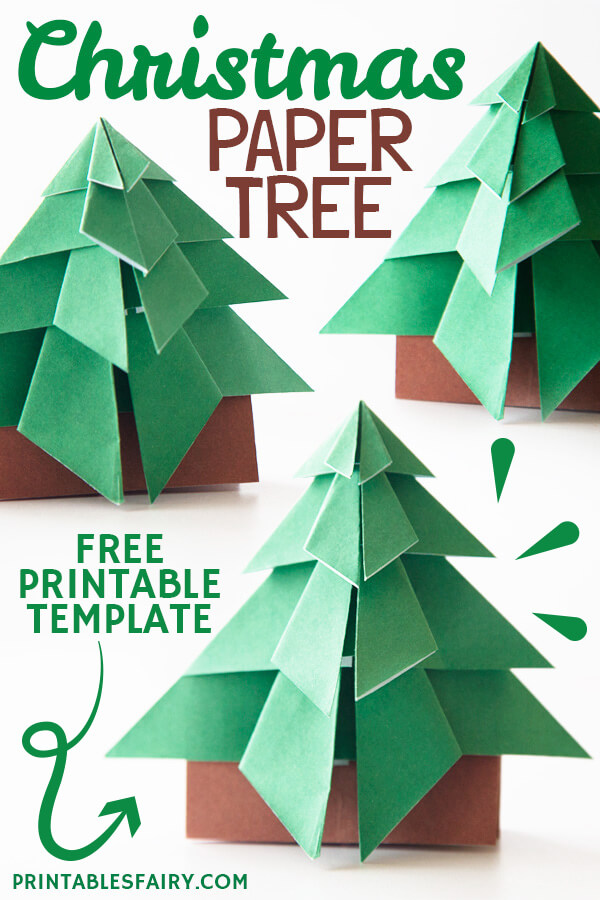
3D Christmas tree template
Ready to craft your own mini-trees?
Download the template by clicking the link below and make your own 3D Christmas trees out of paper!
DOWNLOAD THE 3D CHRISTMAS TREE TEMPLATE
*Please remember that these printables are for personal use only. You may not sell or distribute the files. If you want to share them, please link to this post and not directly to the PDF files.
More Christmas Crafts