Lighten up, it’s Christmas time!
This week we finally set up our Christmas Tree, and that inspired us to create these Christmas Tree Corner Bookmarks.
If you are planning to gift books this year, squeeze in these fun bookmarks. They will get your kids extra excited to craft them and use them with their new books.
These Christmas tree bookmarks can also serve as interactive party favors for any holiday party you are hosting.
And I can guarantee that they will be a hit at your classroom Christmas parties too!
They are simple enough for kids of all ages. However, I recommend skipping the final cutting part if you are working with small kids, as it can be a little hard for them.
Just leave the trees as they are. They will look just right!
Scroll down to learn how to make these bookmarks and to download the template.

How to Make a Christmas Tree Corner Bookmark
As always, I included a video with detailed instructions on how to fold these bookmarks.
But if you prefer to read, there is a written tutorial right under.
Materials
- Printable Christmas tree bookmark template (Get it here or at the end of this post)
- Regular white paper and printer
- Scissors
- Glue
Step-by-Step Folding Tutorial
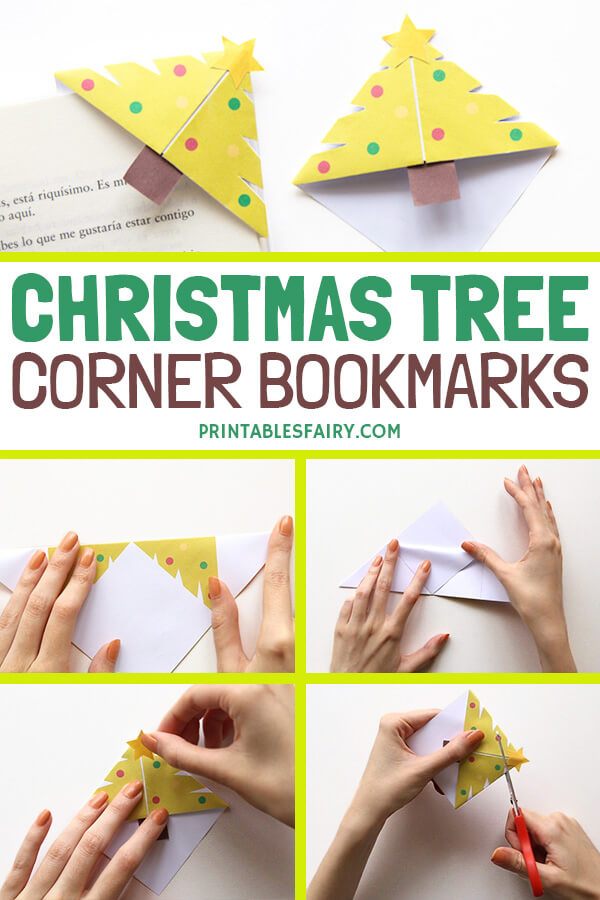
- Print and cut the Christmas tree bookmark template.

- Take one of the corners and fold it towards the opposite corner to make a triangle.

- Turn the triangle over. Make sure that the top tip is facing away from you, and the tree is facing down.

- Take the bottom right corner and fold it towards the top of the triangle. Repeat this step for the left side.

- Unfold the bottom corners.
Fold the top layer towards the bottom to create a pocket for your bookmark.

- Fold both corners back up and tuck them inside the pocket you just created.

- Flatten your tree. Glue the stem behind it, and the star on top of it.

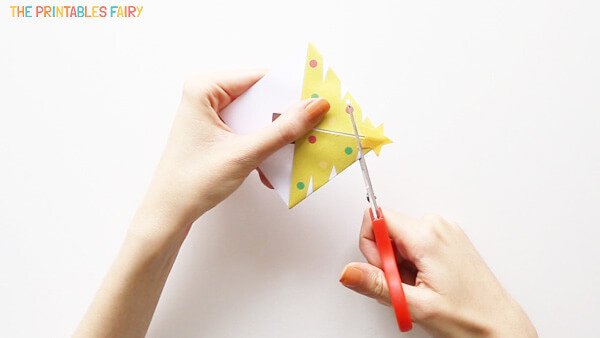
- Finally, cut out the white triangles at the sides or leave your tree as it is.
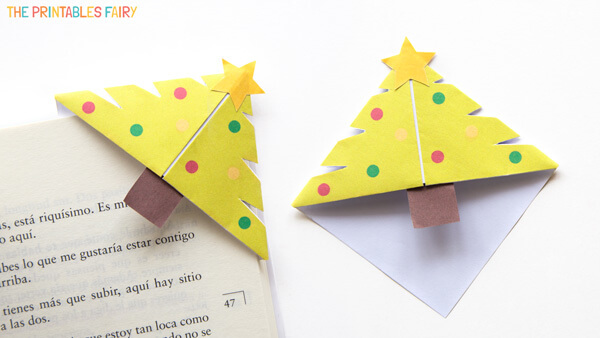
Your Christmas tree bookmark is ready to light up your books.

Printable Christmas Tree Bookmark
Time to make your own Christmas tree bookmark!
Click the link below to get the printable template plus 3 other Christmas bookmark designs you’ll love!
And for those who are very creative, I also included a template with an empty Christmas tree.
You can decorate it with markers or make colorful baubles with a hole punch.
Ready to create your own tree bookmarks?
GET THE CHRISTMAS TREE BOOKMARK TEMPLATE
*Please remember that these printables are for personal use only. You may not sell, share, or distribute the files.
Christmas Tree Bookmark
Follow these easy steps to make a Christmas tree corner bookmark with our printable template.
Instructions
- Print and cut the Christmas tree bookmark template.
- Take one of the corners and fold it towards the opposite corner to make a triangle. Keep both sides of the tree on the same side.
- Turn the triangle over with the top tip facing away from you and the tree illustration facing down.
- Fold the top layer towards the bottom to create a pocket for your bookmark.
- Take the right bottom corner, fold it towards the top of the triangle and tuck it into the pocket.
- Repeat the last step with the left side.
- Glue the stem behind the tree and the star on top of it.
- Cut out the white triangles at the sides or leave your tree as it is.
More Holiday Bookmarks: