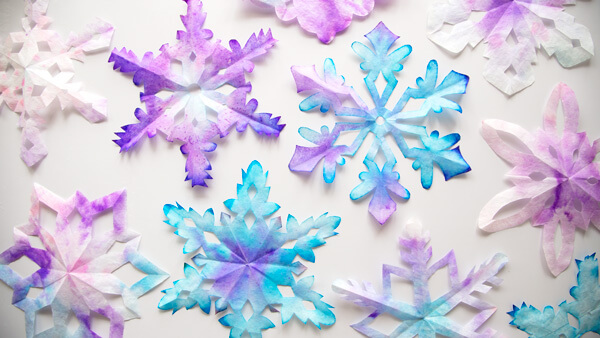
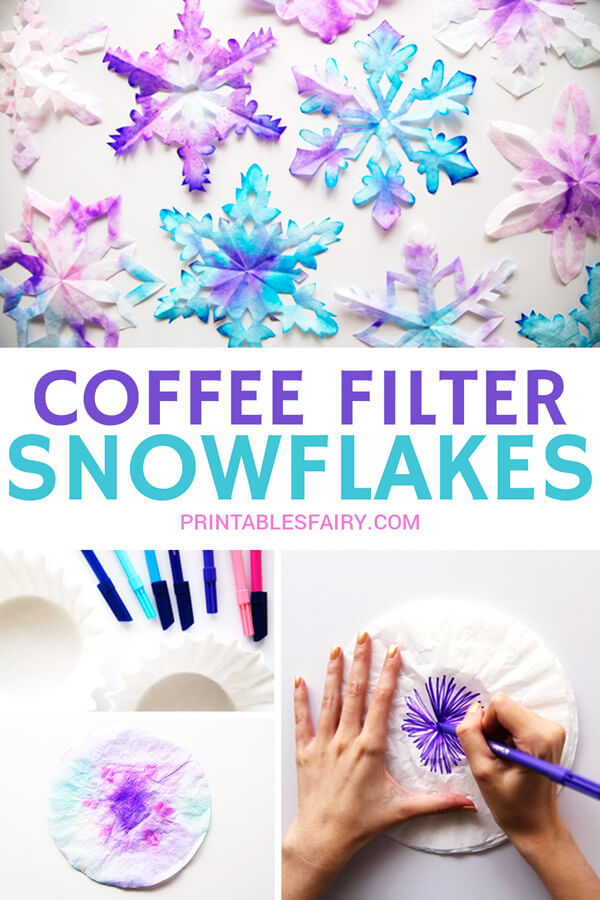
Want to learn how to make these beautiful Coffee Filter Snowflakes?
In this post, I’ll show you exactly how!
There is a step-by-step written tutorial and video right under it.
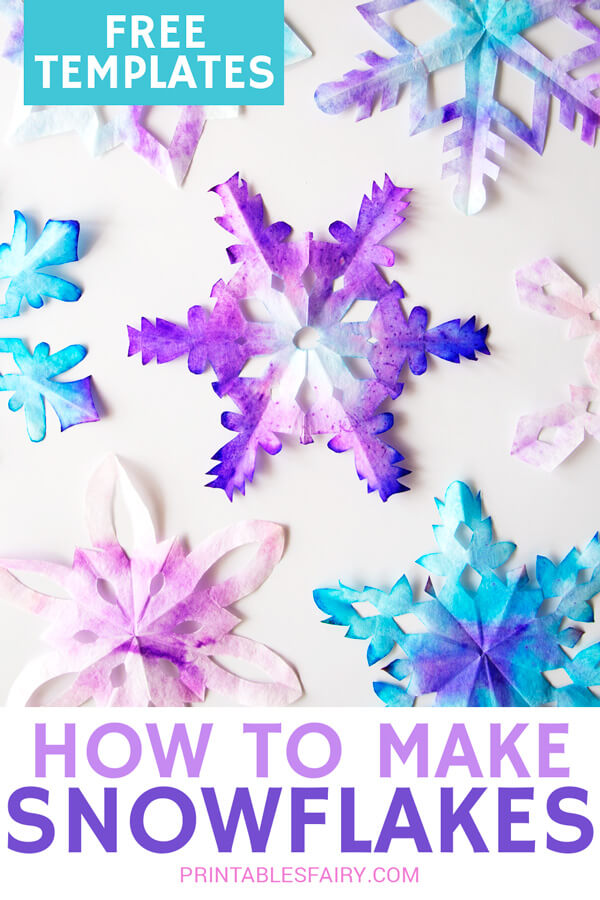
Plus, I’ll share some free printable templates that you can use to make your designs.
Are your kids obsessed with everything Frozen? Then, they will be super excited to try this craft!
Inspired by Elsa’s superpowers, we created these colorful and easy snowflakes.
I came up with this project idea right after watching Frozen II, hence why we used blue, purple, and pink markers only. But, you can let your kids pick any color combination they want.
These coffee filter snowflakes are fun to create on those days where it’s too cold to go outside.
They can be great accessories to decorate your home during winter or if you are hosting a themed birthday party.
And not only that, they are excellent for your preschoolers to practice their cutting skills.
Since coffee filters are lightweight, they are easy to cut through. This makes them perfect for small kids who are getting started with cutting.
You can also use them to teach color mixing because the water allows the colors to bleed together, creating new colors.
Ready to start this arts and crafts project?
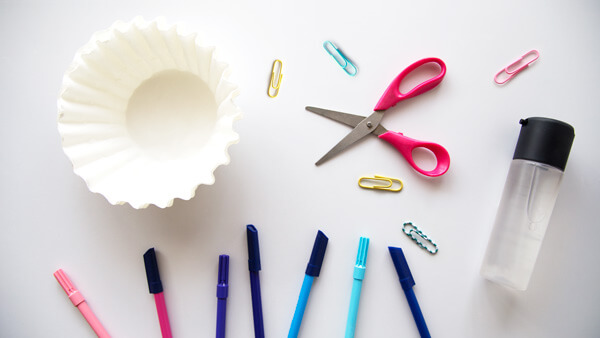
Supplies for Coffee Filter Snowflakes
- Coffee filters
- Washable markers
- Water spray
- Scissors
- Paper clips
- Free Printable Snowflake Templates (download them at the end of this post)
The coffee filter size doesn’t really matter, we used the ones we currently have at home. They are basket-shaped filters in an 8-12 cup size.
You can use any size that you have available.
I also recommend having a tray handy to contain the mess. If you don’t have one, you can cover your working area with plastic bags or paper towels.
How to Make Coffee Filter Snowflakes
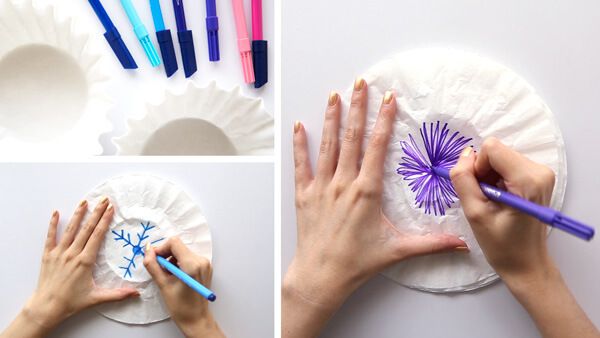
1. Start by flattening your coffee filters and coloring them with washable markers.
You can decorate them with drawings, patterns, or just doodles, in the end, it is not really important as all the colors will blend together.
One thing we discovered while making these is that if you leave less white space (cover more areas with the markers), your colors will look bolder once your snowflake is completed.
2. Once you have completed your designs, place your coffee filters onto trays to keep the mess to a minimum and spray them with water.
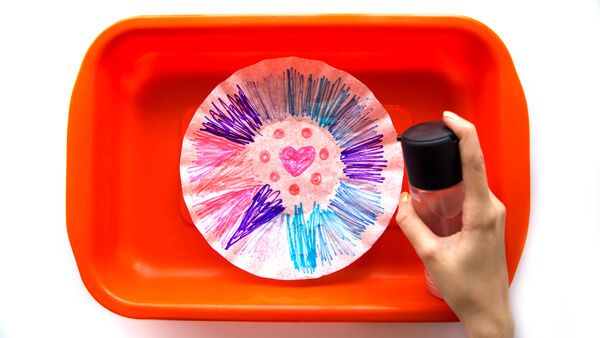
Make sure the entire coffee filters are wet and watch the colors dissolve.
You can also swirl the filters around to make the colors move to different places (the tray was handy for this too).
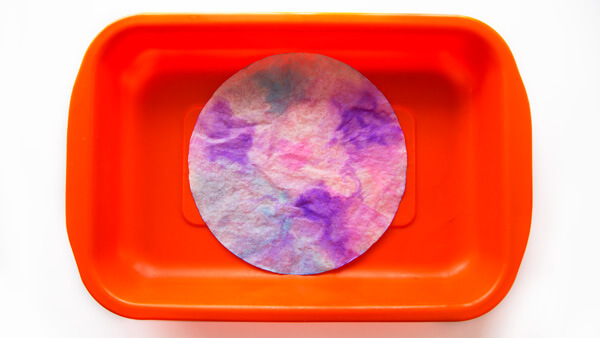
3. It is time to let them dry completely.
Most of our filters dried out in just 2 hours, but others were really wet and we had to let them dry overnight.
Keep this in mind when spraying your filters to avoid going crazy with the water.
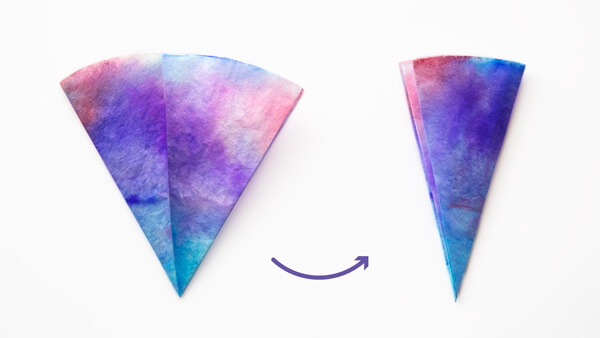
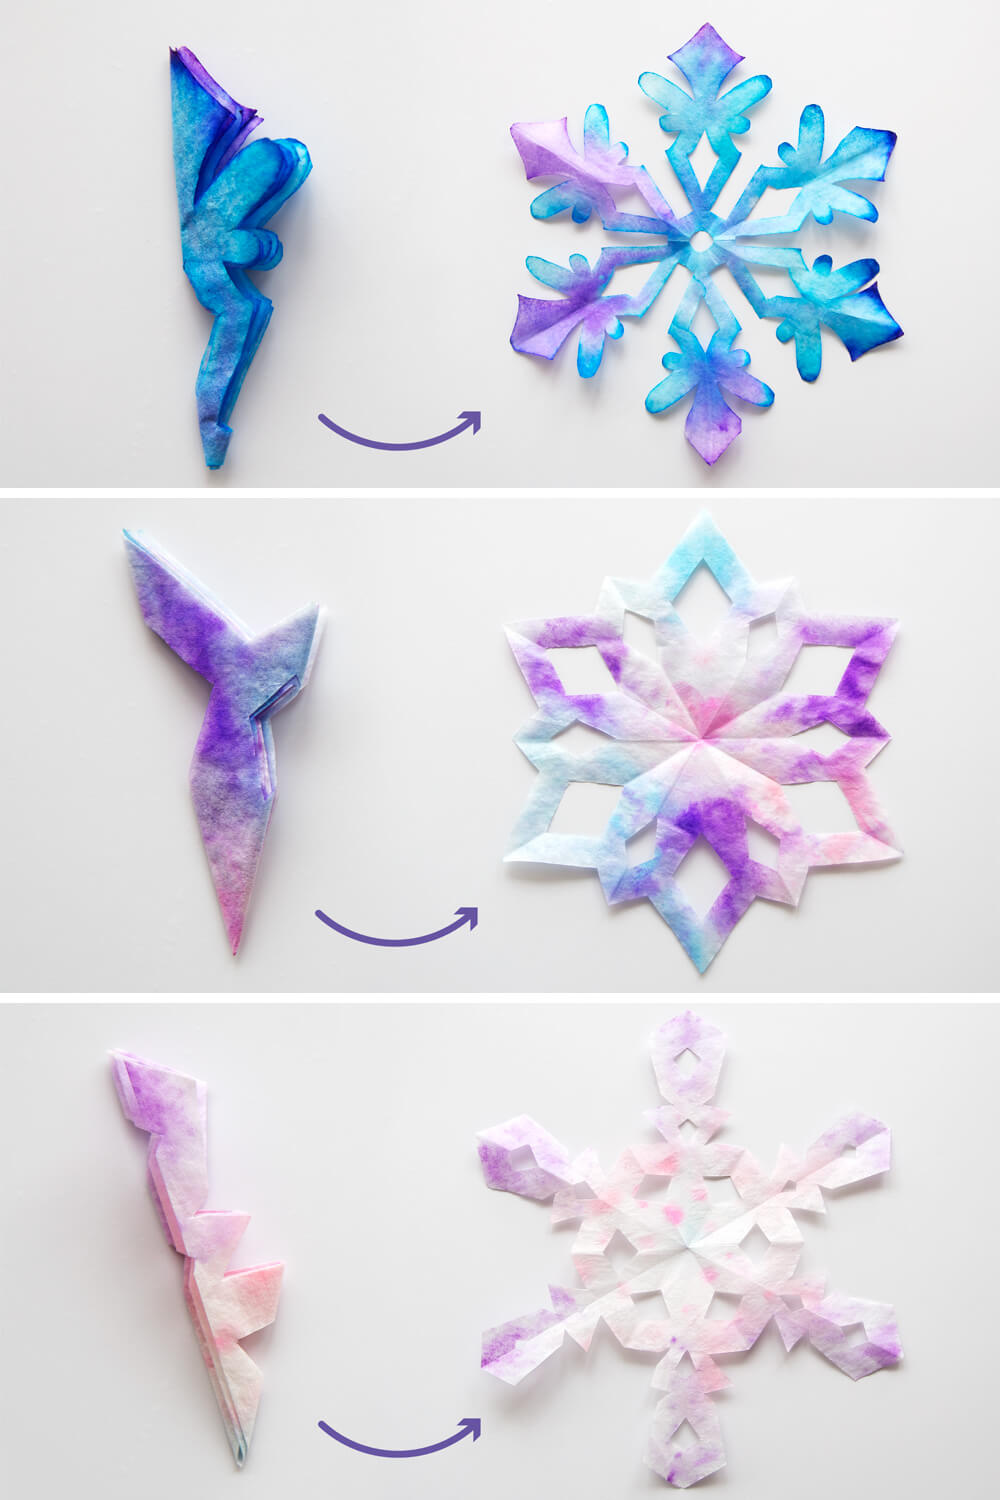
4. Now that your filters are totally dried, it’s time to learn how to fold them and create those cute snowflakes.
First, fold the coffee filter in half.
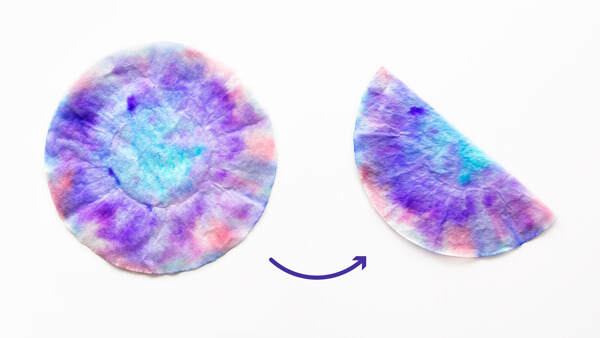
5. Then, fold it again in half.
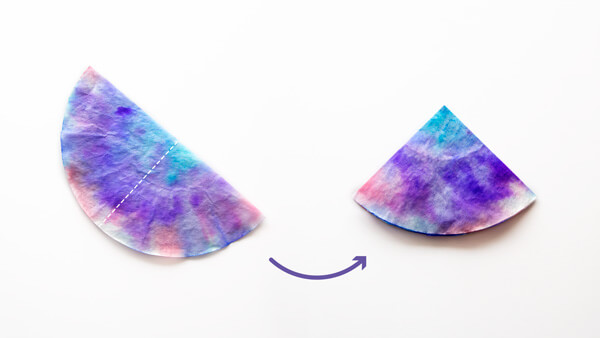
6. Finally, fold your piece into thirds.
Bring the left side to the right so that it’s ⅓ of the way over and repeat with the right side.
The edges should line up and create some sort of triangle.
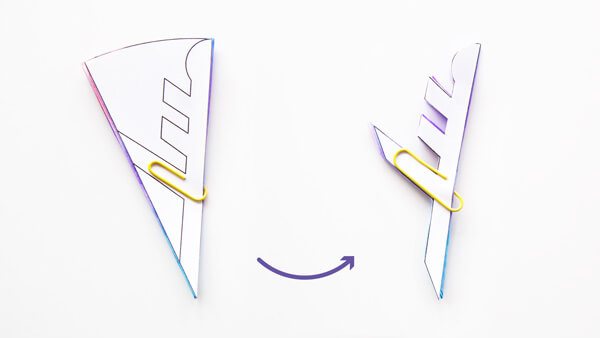
7. Print and cut your snowflake templates if you used the same coffee filter cup size as us.
There are 9 different designs to choose from.
Let your kids pick the one they like the most and attach it to the coffee filter with a paperclip, just like in the picture below.
Help your children cut following the lines.
If you used a different cup size filter, the free printable templates might not fit. But, you can still use them as a reference to draw your own snowflakes.
You can also let your kids make their own unique designs once they are done with the templates.
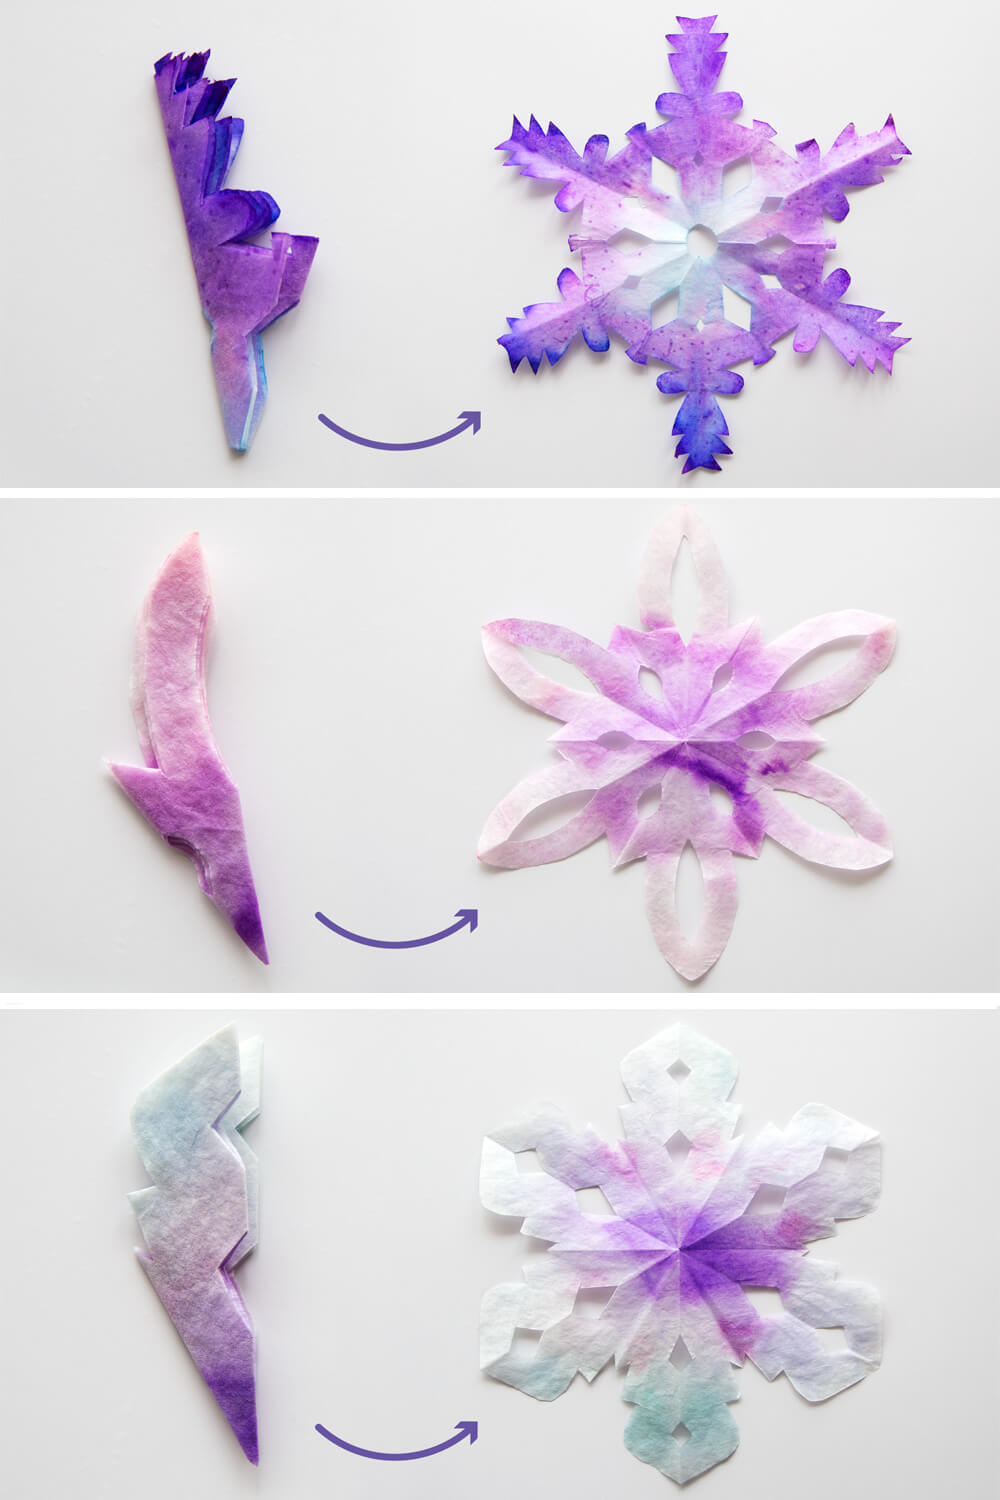
8. Finally, remove the paper template and unfold the coffee filter to reveal your snowflakes.
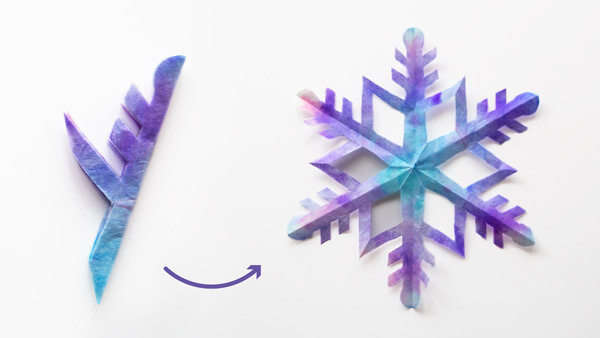
Let your kids get creative with their color choices and designs.
Below you can see the snowflakes we created using the printable templates.
Don’t wait any longer to make your own!
Step-by-step video instructions
Watch the video below to learn how to make these coffee filter snowflakes using the free printable templates available at the end of the post.
Tips to make these snowflakes
- For extra vibrant results, you can invert the process. First, cut the snowflakes; then, color them and spray them with water.
I recommend this process for older kids. If you do it this way with younger children, help them with the coloring as it can be a little tricky to paint the small corners.
- You can use eyedroppers if you don’t have a spray bottle available.
- Make sure your filters are 100% dry before cutting them, or you will end up with stained hands. Also, it’s easier for kids to cut dry filters.
- When you open your snowflakes, they can have a lot of creases. To make them lie flat, let them rest a couple of minutes under a heavy book. Or, iron them in between parchment paper.
- If your kids feel extra creative, let them add glitter and embellishments onto your snowflakes.
- You can hang your colorful snowflakes in a window using double sided tape. They make wonderful winter suncatchers!
Snowflake Templates
You can download the templates by clicking the link below.
Print them out on regular paper at full size and cut out each triangle.
There are also folding instructions in case your kids need an extra reminder.
*Please remember that these printables are for personal use only. You may not sell or distribute the files. If you want to share them, please link to this post and not directly to the PDF files.
UPDATE: Now you can also print the instructions by clicking the Print button below!
How to Make Coffee Filter Snowflakes
Materials
- Coffee filters (8-12 cup size)
- Washable markers
- Water spray
- Scissors
- Paper clips
- Free Printable Snowflake Templates (download them at https://www.printablesfairy.com/coffee-filter-snowflakes/)
Instructions
- Flatten your coffee filters and color them with washable markers.
- Place your coffee filters onto a tray and spray them with water. Swirl the filters around to make the colors move to different places.
- Let the coffee filters dry completely.
- Fold your coffee filters in half
- Then, fold it in half again.
- Fold your piece into thirds.
- Print and cut your snowflake templates and attach them to the coffee filters with a paperclip. Then, cut along the lines.
- Finally, remove the paper template and unfold the coffee filter to reveal your snowflakes.
Notes
For pictures, detailed instructions, a video tutorial, and to download the templates, please visit my site. Link below.
More winter activities:
Thank you for your incredibly high-quality video tutorial, blog post, and free PDF template!! It’s generous of you to create this content and share it. I appreciate it so much and can’t wait to make these snowflakes with my students to go with our read-aloud book, “Snowflake Bentley.” THANK YOU!
Thank you, I look forward to trying these.
Hope you have fun!
These were so much fun with my nephew!! Love them! Thanks for the templates! 🙂
I’m really happy to hear that Aimee! Snowflakes are very fun!
One way that we made our paper snowflakes (from tissue paper) stick to the windows was to layer them between two sheets of plastic wrap. After laying the snowflake on the bottom layer of wrap, you then coat it with shellac and lay the top layer of wrap carefully over. When the shellac has dried fully, carefully cut around the snowflakes. To apply to the window, just use a damp sponge over it and it will stick to the window and can be easily peeled off and moved. I learned this method back in my long ago school days in the 70s. Happy crafting!
Rubbing alcohol in a spray bottle should work too. It would probably make them dry faster as well.
What size coffee filters did you use so that the template works?
We used 8-12 cup coffee filters.
You could laminate them so they aren’t flimsy. They could even be made into ornaments.
These are great ideas!
Love the idea and technique. We made numerous snowflakes and would like to display them in the window. Wondering how to make them stiff enough to hang in the window, or even better, to hang freely around the room. I ironed them, but still too flimsy to hang.
Hi Jayne!
We used double-sided tape to stick our snowflakes to the window.
We haven’t tried to hang them on their own because coffee filters get flimsy after adding all the water. You could try to glue two coffee filters together with adhesive spray to make it a bit stiffer before cutting the snowflakes, or try to spray them with hairspray or ironing starch to stiffen them; it might work.