A couple of years ago, I was planning to make some heart bookmarks for Valentine’s Day but remembered that Chinese New Year comes first, and I had not prepared any craft for it yet.
Quickly, I decided to combine them both and create this DIY Mouse Corner Bookmark.
It was the year of the rat, so I figured that this craft would go really well with it. You can call them Rat Bookmarks if you want. They look pretty convincing if you ask me 🙂
I used an easy folding technique that I’m sure kids of all ages can follow, although young children might need some help when cutting the smaller pieces.
This bookmark also requires a little bit of tape to keep its shape intact, especially if it’s going to be slipped into books over and over again.
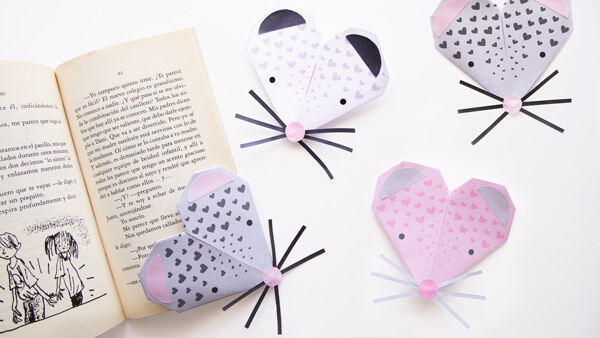
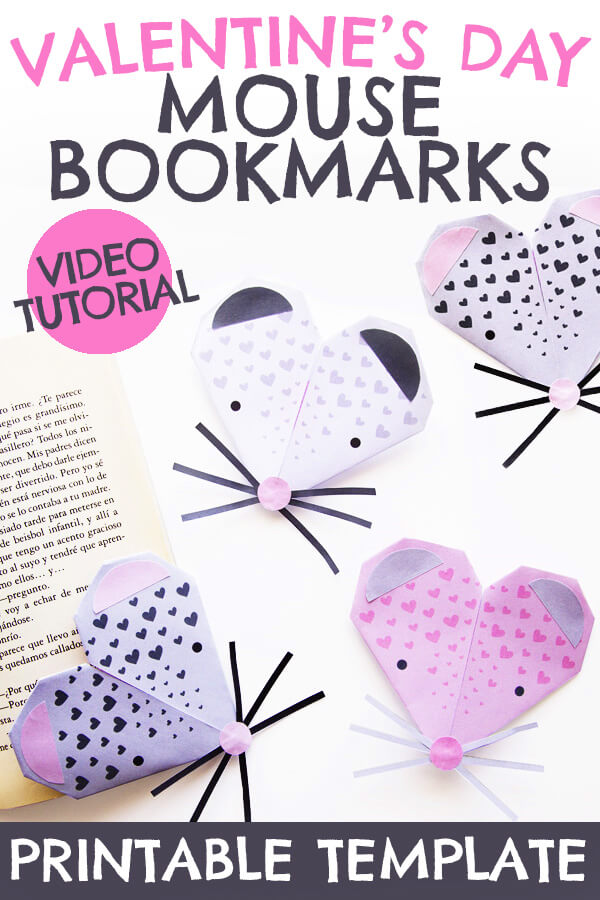
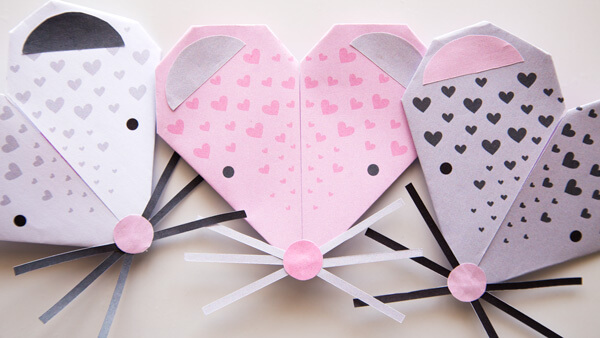
The mice come in 3 different color combinations, so you can print the one you like the most.
Ready to make your own?
Read the instructions, watch the video tutorial, and get your printable templates!
How to Make a Mouse Corner Bookmark
You can watch the video tutorial to see how to fold the template, but if you prefer step-by-step pictures, keep scrolling right under it.
TIP: You can also use these folding instructions to make an easy heart-shaped bookmark.
Materials
- Printable Mouse bookmark template (Link also available at the bottom of this post)
- Regular white paper and printer
- Scissors
- Glue Stick
- Tape
Mouse Bookmark Video Tutorial
Watch this video to learn how to create these mouse corner bookmarks.
Step-by-Step Instructions
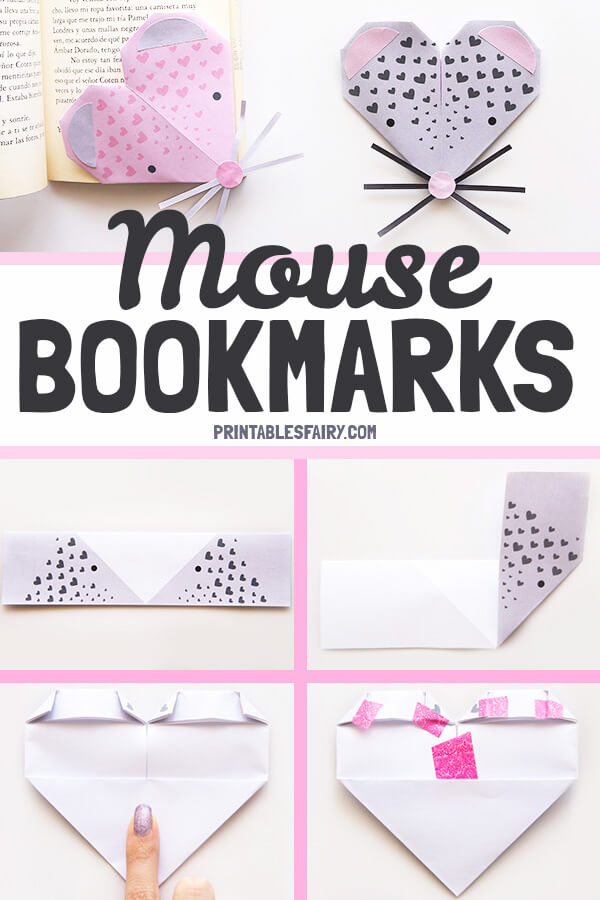
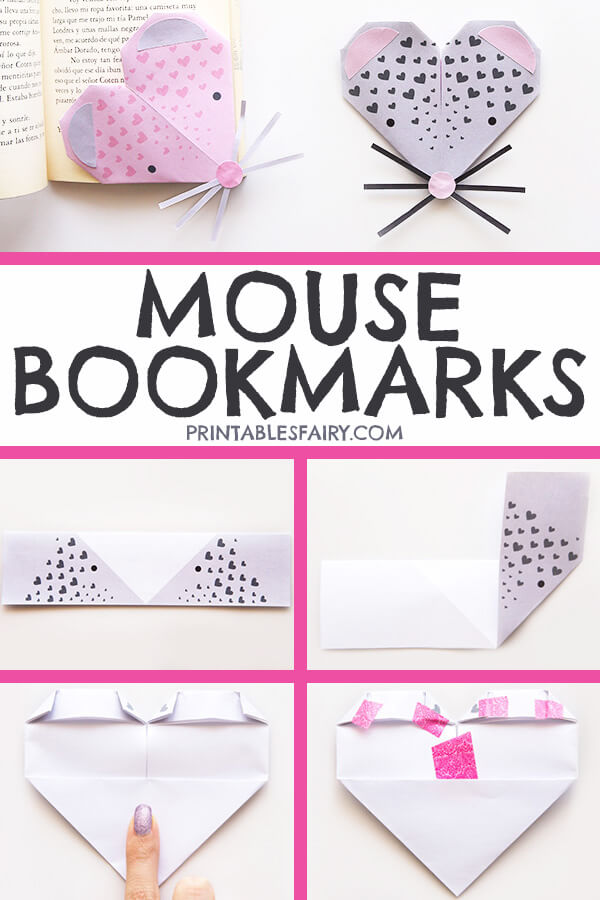
- Print and cut out all the pieces of the template.
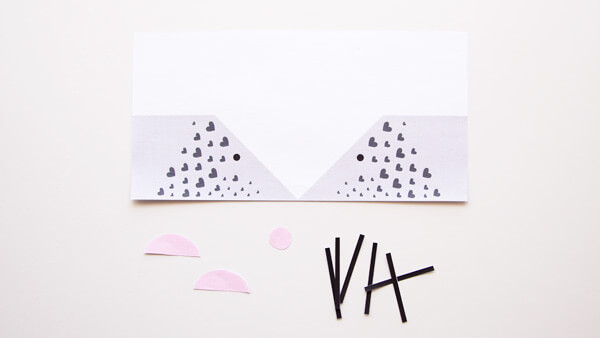
- Take the rectangle and fold it in half horizontally. Leave the printed side on top.
- Crease along the diagonal lines in the middle of the template.
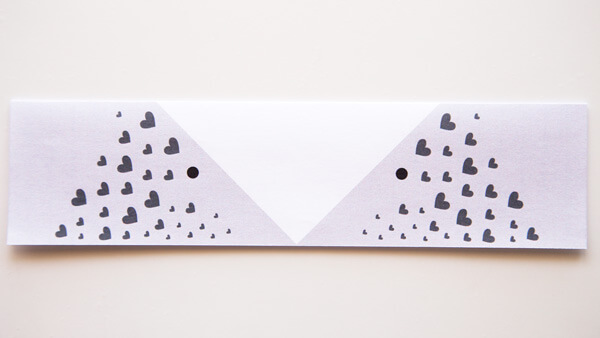
- Flip over the rectangle.
- Fold one side up until the edge aligns with the center. Repeat with the other side. (Reverse the foldings from step 3)
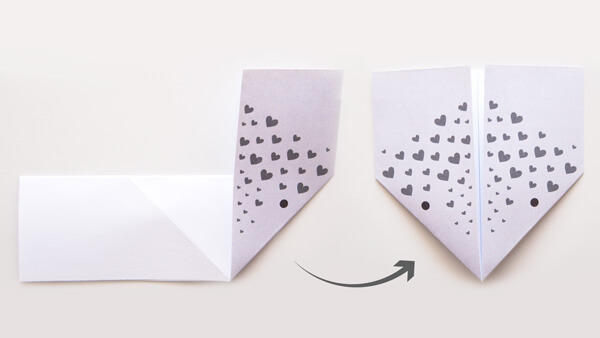
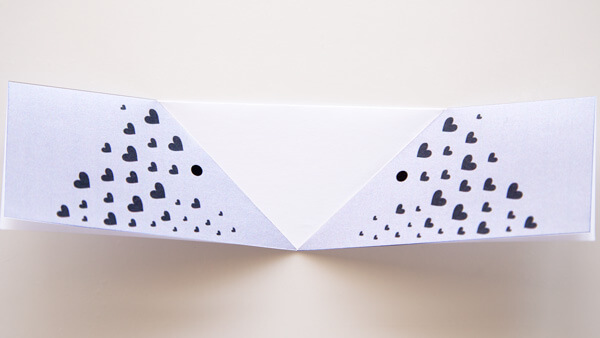
- Fold the top tip backward. You can eyeball this. I folded it right above the hearts.
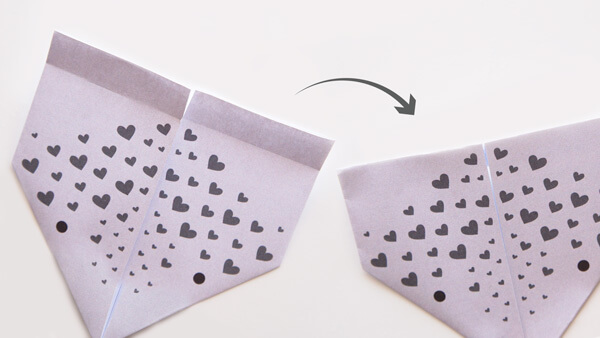
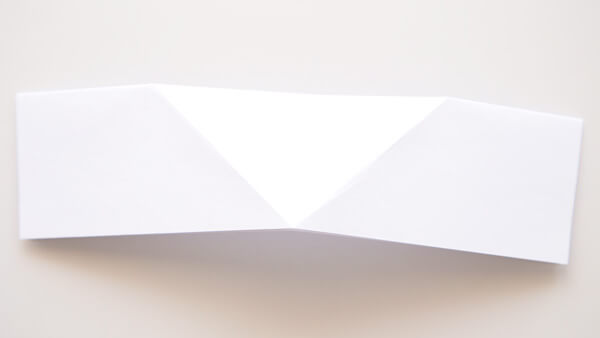
- Turn the bookmark over and fold the corners in. Secure them with tape, as shown below, for ease of use.

- Flip your bookmark and glue the whiskers, nose, and ears.
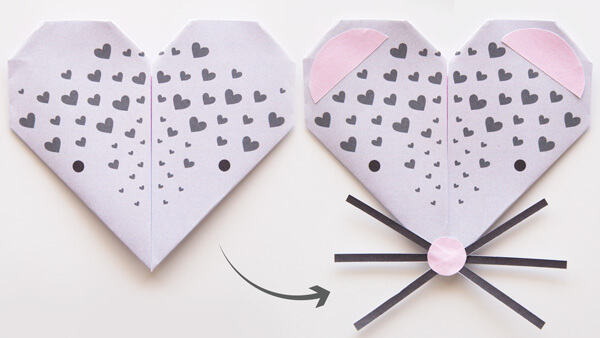
Your mouse bookmarks are ready to say cheese!
Mouse Bookmark Templates
You can get the templates by clicking the link below.
Then, come back to this post to follow the folding instructions if you need them.
These templates come in three different colors: white, pink, and grey.
You can choose and print the one you like the most, or print them all!
GET THE BOOKMARK TEMPLATES HERE
More Animal Bookmarks: