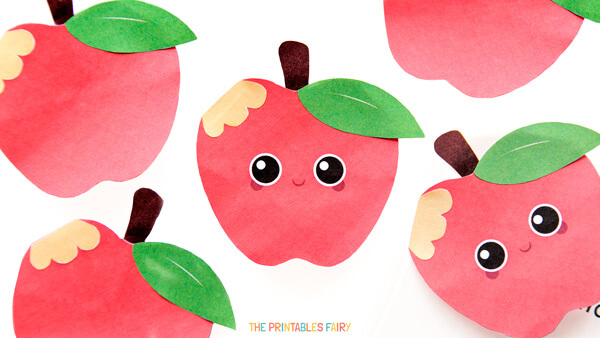
This week, we have been all about folding fruit bookmarks. And to complete our collection, this time, we are making an apple bookmark.
I had a couple of other fruits in mind, but ended up picking this one because we can also use it as a back-to-school craft.
If you are a mom, you can make it at home on the last days of summer.
And if you are a teacher, you can make them on your students’ first day of school or give them as a gift.
It’s super easy and ideal for kids of almost all ages, as the only skills required are cutting, folding, and gluing.
Plus, you can use the printable templates available at the end of this post to make things easier!
And if you have no idea how to fold an origami bookmark, don’t worry. In this post, I’ll teach you how to make your apple corner bookmarks with our templates.
It’s so easy, you’ll end up wanting to make all the fruits. 😉
Ready to make a bookmark that is awesome to the core?
Just keep reading to learn and download!
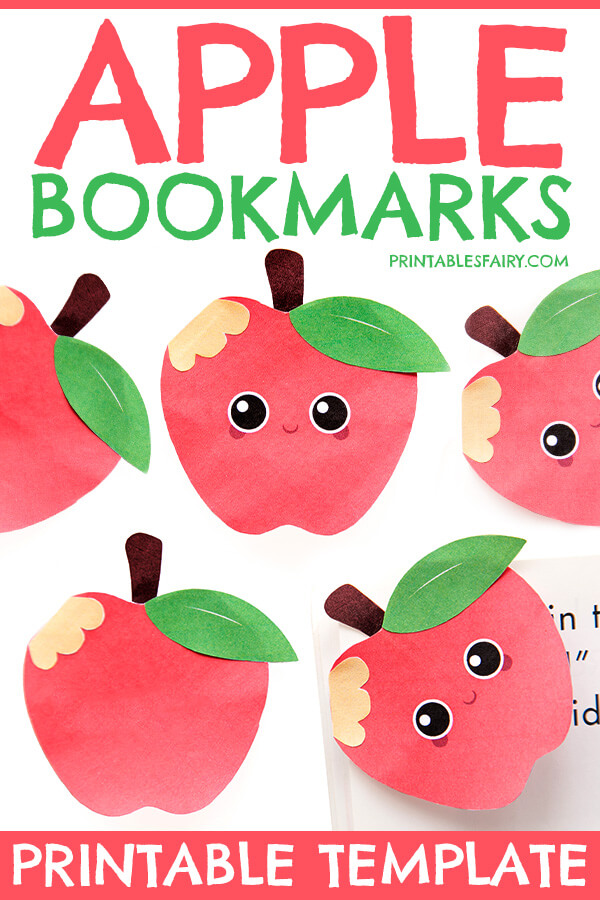
How to Make an Apple Bookmark
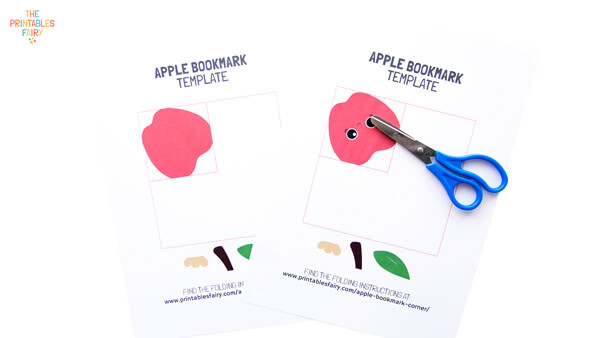
To make your apple bookmark, first select your favorite template. There are two versions included with your download: a regular apple and a kawaii apple.
Just pick the one you like the most, or print them both!
Then, go ahead and follow the step-by-step photo instructions below, or watch the video tutorial. (You can find it right under the written instructions).
Materials
To make these easy bookmarks, you only need:
- Apple Bookmark Templates (Get them here or at the end of this post)
- White paper
- Printer
- Scissors
- Glue Stick
Apple Corner Bookmark Instructions
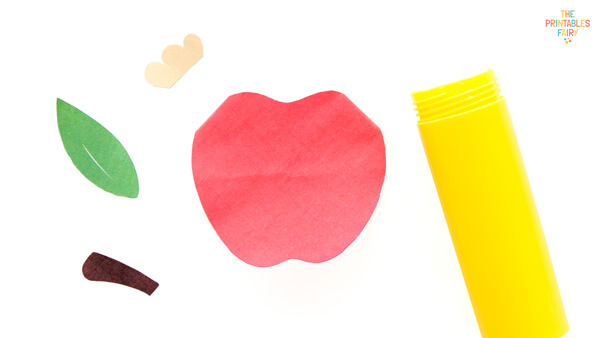
- Print your favorite apple bookmark template on white paper and cut out all the parts.
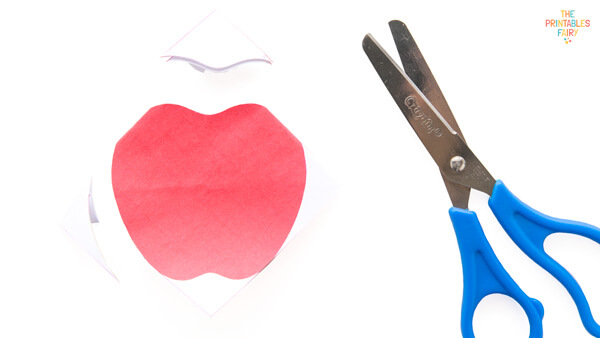
- Take your main square and fold it into a triangle with the apple on top.

- Fold along the red lines and crease well.

- Unfold the corners.

- Flip over your bookmark and bring the left and right corners to the bottom.

- Unfold the corners and fold the top layer to the middle top to create a pocket.

- Tuck the left and right corners into the pocket.

- Cut out the white areas surrounding your apple.
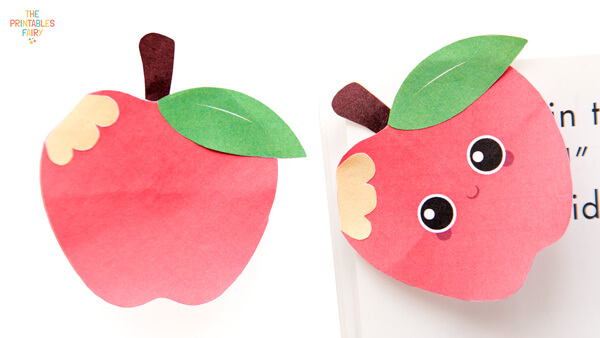
- Glue the stem, leaf, and flesh.
Your apple bookmarks are ready for many apple-y ever afters!
Wanna share your results with us?
Just tag @theprintablesfairy on Instagram. We’d love to see your apples!
Apple Corner Bookmark Video Tutorial
As always, here is a quick video where you can see me fold a kawaii apple bookmark from scratch.
I hope you find it helpful, and feel free to watch it as many times as you need.
* Remember that you can follow the same steps if you fold the normal apple version.
P.S. Subscribe to my YouTube channel for more content!
Apple Bookmark Template
Whether you are going to make these bookmarks to celebrate the first day of school or say goodbye to the summer, I’m sure your kids will love them!
Remember that they are part of the Fruit Bookmark Collection, including both apple printable templates + 3 more fruits.
Get them all by clicking the link below!
GET THE APPLE BOOKMARK TEMPLATES
*Please remember that these printables are for personal use only. You may not sell, share, or distribute the files.
Check The Other Fruit Bookmarks
