Summer is here, and with it comes a big list of books to read during the holidays.
Naturally, not all kids find that exciting. But there are many things you can try to encourage some summer reading.
Ideas like starting a Summer Reading Challenge, having a reading picnic outdoors, or making a fun craft like this can help your kids pick up some books.
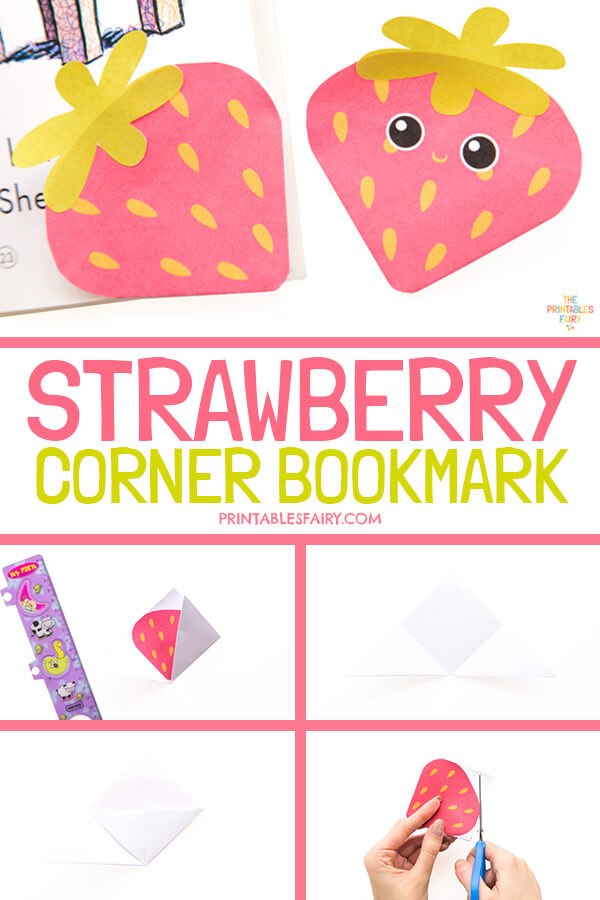
In this post, I will teach you how to make a Strawberry Corner Bookmark using our printable templates (that you can also get at the end of this post 😉).
They are super easy to make and perfect for kids of almost all ages, as the only skills required are cutting, folding, and gluing.
If you are working with young kids, you can do the cutting for them.
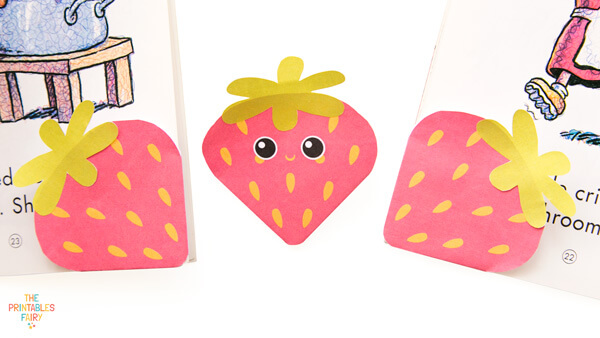
We love this craft because it can actually interact with the books and features some cute berries. Who doesn’t like them, right?
You can use them as a last-day-of-school craft, include the template with your students’ reading list, or simply craft them at home when your kids are bored.
Ready to learn how to fold your own?
Keep reading this post!
How to Make a Strawberry Corner Bookmark
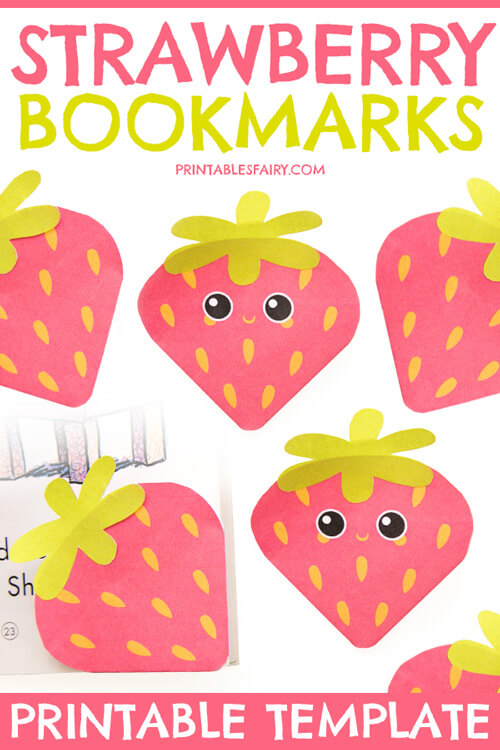
Making these strawberry bookmarks is super easy with our printable templates.
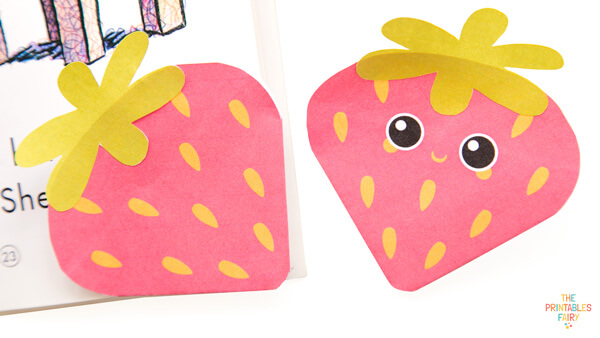
There are two versions included: just the fruit and a kawaii version of it.
Just pick your favorite and start folding following the step-by-step instructions outlined below.
If you have never made a basic origami bookmark before and are a little confused, it may be better for you to start with the video tutorial. You can find it right under the written instructions.
Let’s get into it!
Materials
To make these cute bookmarks, all you need is:
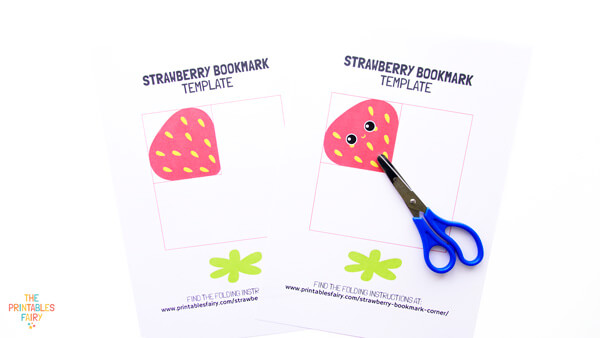
- Strawberry bookmark templates (Get them here or at the end of this post)
- Regular white paper
- Printer
- Scissors
- Glue
Strawberry Bookmark Instructions
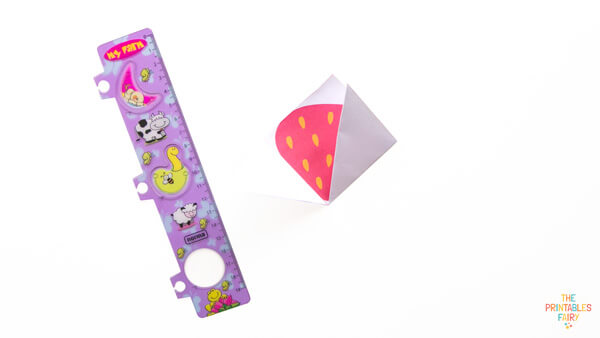
- Select your template and print it on regular white paper. Then, cut out the square.
- Fold the square in half diagonally.

- With the help of a ruler, fold along the left and right edges of the strawberry and unfold them.
- Flip your bookmark over to make the berry face down and bring the left and right corners to the top corner.

- Unfold the corners.

- Fold the top layer down to the bottom of the triangle to create a pocket.

- Fold the left and right corners into the pocket.

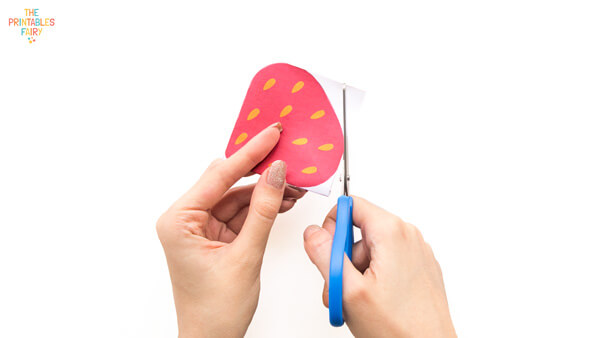
- Trim the white parts around your berry.
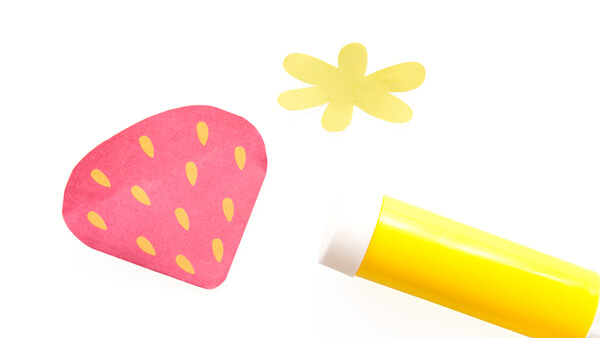
- Cut the leaves from the template and glue them on top of your strawberry.
Your berry special bookmark is ready to mark your pages!
How did yours turn like?
Share your pictures with us on Instagram by tagging @theprintablesfairy.
Video Tutorial – Kawaii Strawberry Bookmark
If this is your first time folding a corner bookmark from scratch, you might prefer watching a video. And I got you!
In this tutorial, you can see how I folded a kawaii strawberry bookmark in real-time.
Feel free to pause and rewind as many times as you need!
And remember that you can follow the same steps if you fold the simple version of this bookmark.
P.S. Subscribe to our YouTube channel if you don’t want to miss our other craft tutorials.
Strawberry Corner Bookmark Template
These cute bookmarks are part of the Fruit Bookmark Collection, including an apple, a pineapple, and a watermelon.
They are all equally adorable and easy to fold.
Ready to make your own bookmarks?
Get the berry bookmark templates (+ 3 more) by clicking the link below.
GET THE BERRY BOOKMARK TEMPLATES
*Please remember that these printables are for personal use only. You may not sell, share, or distribute the files.
More Fruit Corner Bookmarks