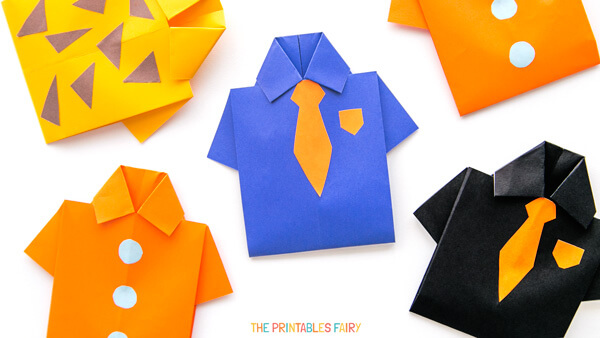
Last year, we made this easy Shirt Card for Dad, and it was such a big hit with the kids that we wanted to take it to the next level.
How is that even possible, you might be asking?
Well, we’ll make our own shirt from scratch!
In this post, I will teach you how to fold an origami shirt without all the struggle.
It is so easy that I’m sure most kids can do it effortlessly, but just to make sure every step is clear, I’ve included pictures and a video tutorial.
This origami craft is so cute on its own but can also be used as a card.
How? Just open it and write a little note inside.
Of course, you can use this shirt on Father’s Day, but it’s also perfect for birthdays, promotions, Grandparents Day, or just because!
And the best part is that you only need a piece of paper.
Sounds good?
Make this easy DIY origami shirt with us by following the step-by-step instructions below.

How To Fold An Origami Shirt
Ready to make a unique and memorable card for dad?
In the following video, you can see exactly how I folded an origami shirt.
If videos are not your thing, just scroll a little further to find all the written directions + pictures of every fold.
But first, here is a little list of materials you’ll need to complete this craft.
Naturally, you only require a piece of paper.
But if you want to take your shirt to the next level, a couple of materials that I’m sure you already have at home will be necessary.
Materials
- A rectangular piece of paper
- Paper scraps of any color or size (optional)
- Scissors (optional)
- Glue (optional)
- Markers (optional)
Video Tutorial
Here is a small tutorial where I show you how to make your own origami shirt.
You can also watch it on my Youtube channel. Just click here.
Step-by-step Instructions
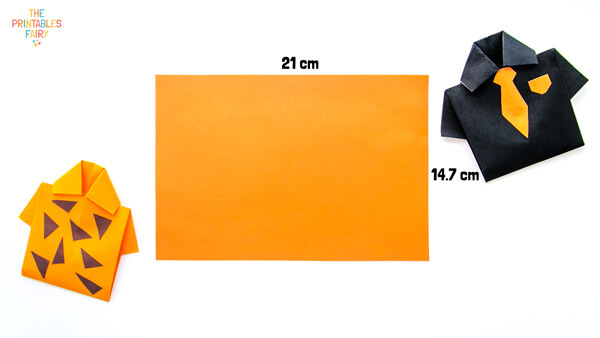
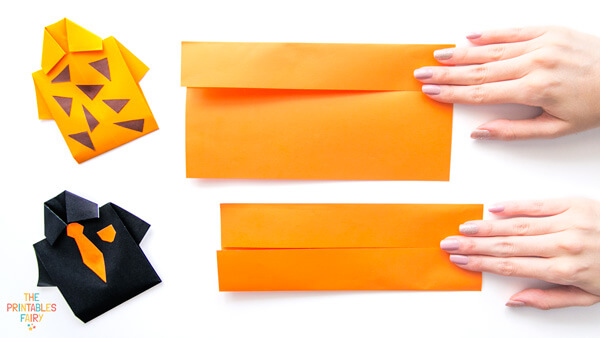
- Start with a rectangular piece of paper.
In this case, I used a 21 x 14.7 cm rectangle, but you can use any size.
You can even replace the paper with a bill (it’s super popular!).
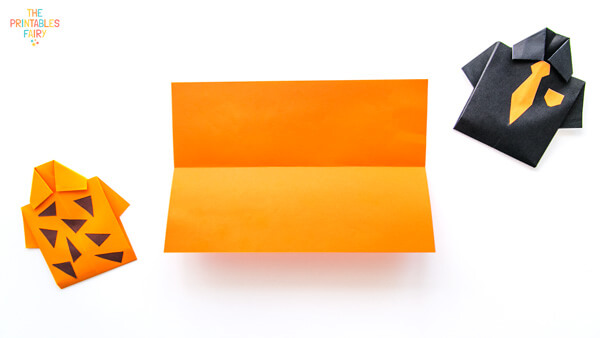
- Fold the rectangle in half lengthwise to create a crease down the middle of the paper.

- Unfold it.
- Fold the top and bottom of your rectangle towards the crease that you made in step 2.
- Turn your rectangle vertically and measure 2cm from the top.
This doesn’t need to be super precise, so you can eyeball it.
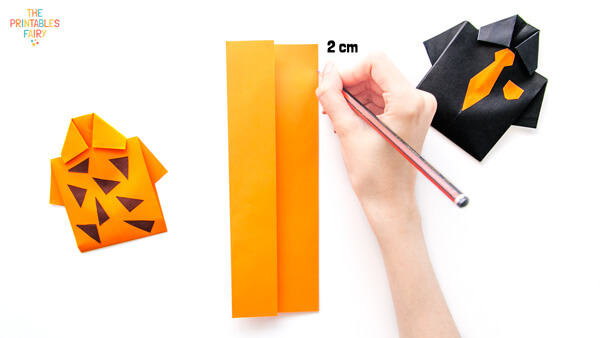
Keep in mind that this measurement depends on your rectangle size. So, make it bigger or smaller according to it.
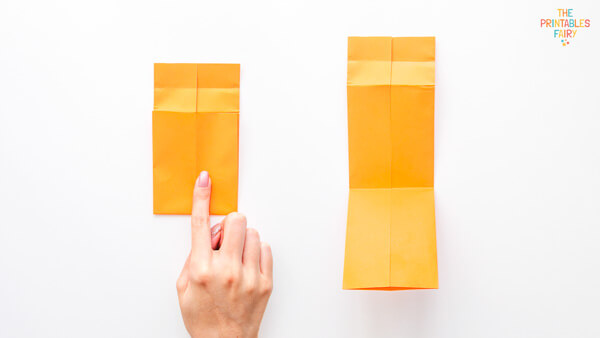
- Fold the top edge down (use the measurement from the step above).

- Repeat the previous fold and unfold both of them.
Now you should have 2 creases.

- Bring the bottom of the paper up to the second crease and unfold it.
- Go back to the top and fold back along the first crease.
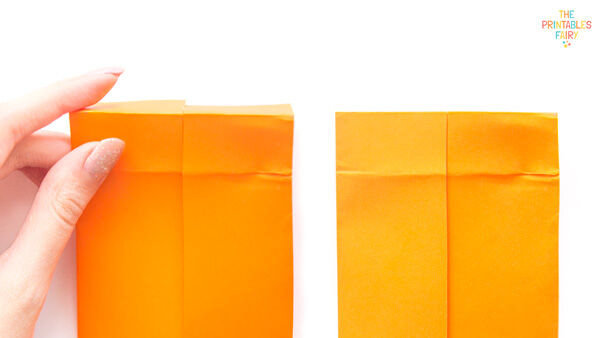
- To make the collar of the shirt, fold the left and right corners towards the middle crease (center of the +).
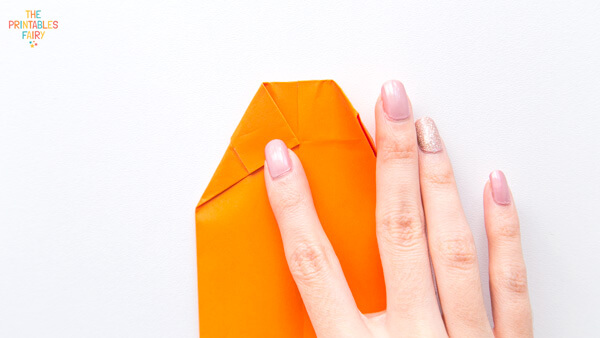
- Measure around 3 cm from the middle crease down and fold the bottom flaps out at an angle to make the sleeves.

- Bring the bottom of the paper up and slide it under the collar.

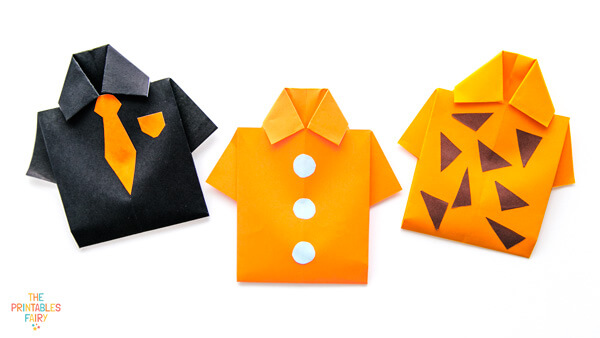
- Now, you can leave it like that, or add some fun dots, stripes, buttons, a little pocket, a tie, or a bow with the help of the optional materials I mentioned above.
In this case, I used scissors and paper scraps to make the decorations for these shirts and glued them on top.

Congratulations!
You just completed your origami shirt!
Gifting Your DIY Shirt
How did your shirt turn out?
Please share with us on Instagram by tagging @theprintablesfairy. We always love to see your creations!
And don’t forget to untuck your finished card to write a special note on the inside. It will make this gift extra special.
P.S. You can also pair this origami shirt with an actual shirt that looks similar. I’m sure dads will love that!
And if you have other gift ideas to accompany this cute craft, please share them in the comments below!
More Father’s Day Shirt Cards