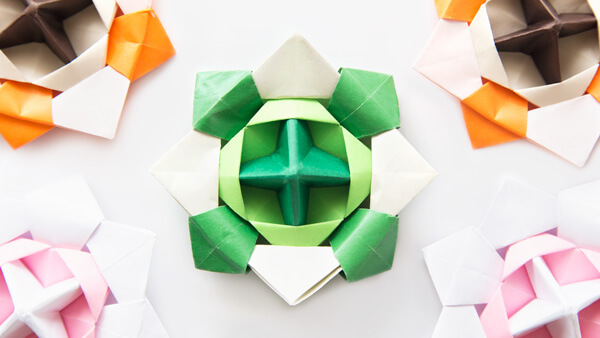
Making paper models is always fun. But you know what is even more fun, playing with them!
We have created some playful origami crafts before, such as the Jumping frogs. But this time, we decided to aim for something a little more advanced, origami spinning tops.
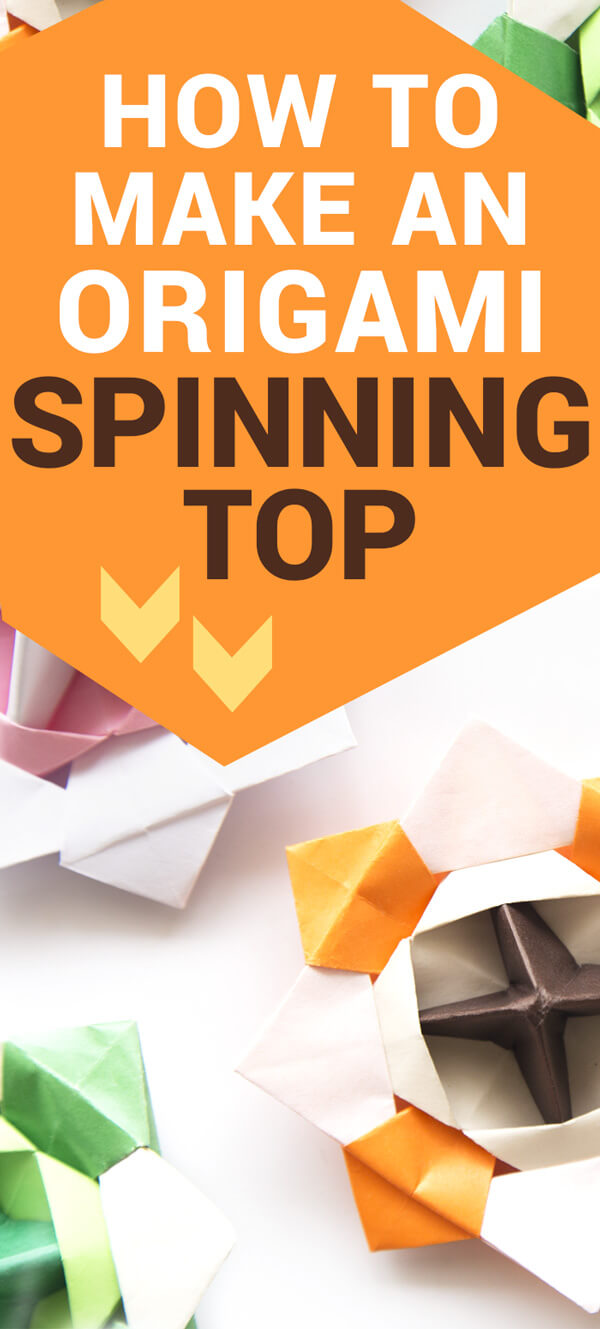
This Spinning Top is a modular origami, which means it uses multiple sheets of paper to create a complex structure.
But don’t be scared! They’re easy enough for most 3rd graders and above. Plus, I included step-by-step instructions and a video tutorial to help your kids understand how to make these fun paper toys.
I also included free printable instructions at the bottom of the post if you need an additional guide.
Once your kids make their spinning tops, they can make a competition to see whose top spins the longest.
I’m sure they will have lots of fun crafting and playing. Let’s start folding!

Spinning Top Origami Instructions
To make this spinning top, you will need 3 paper squares of the same size. Our squares were 14.5 x 14.5 cm (around 5.7 x 5.7 in).
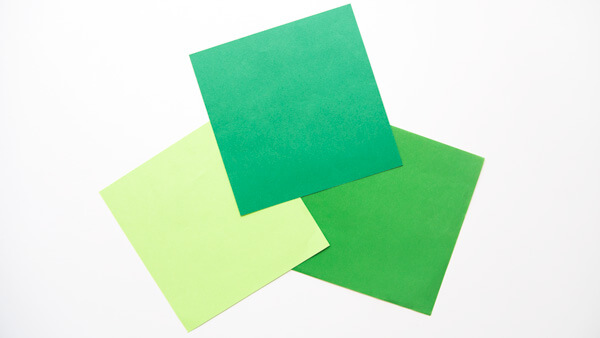
For this model, I recommend using thin paper, such as origami paper, in different colors.
Remember that this is an intermediate origami craft. Encourage your kids to try again if something goes wrong.
Remind them that module 1 is the hardest, but modules 2 and 3 are fairly easy.
And once they understand how it goes, they will want to make more than just one spinning top!
Module 1
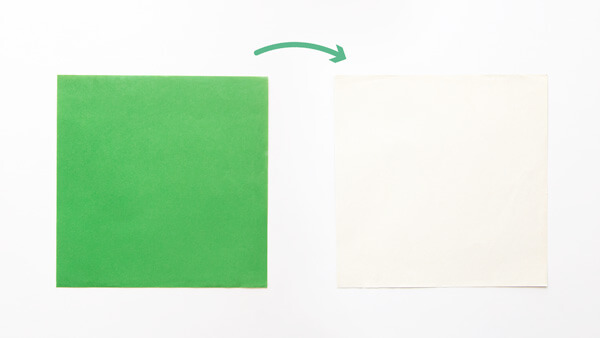
- If you are using one side colored-paper, flip it over so that the colored side is facing down.
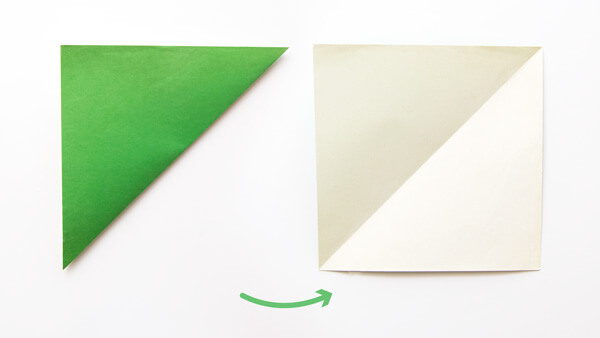
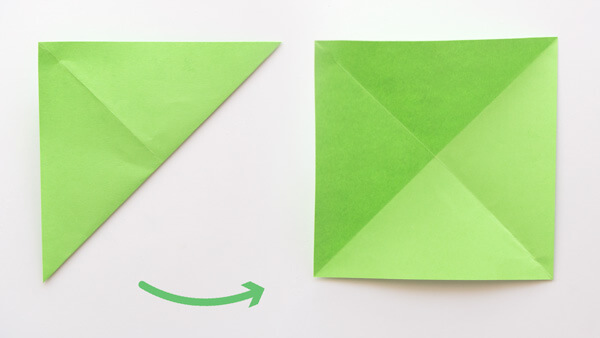
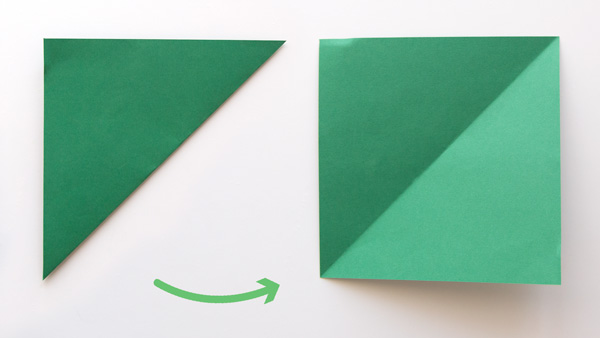
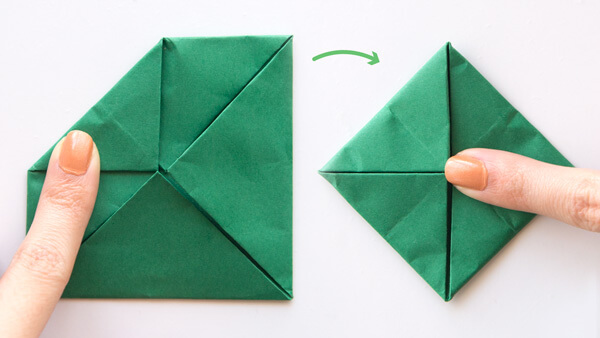
- Bring the bottom right corner to the top left and unfold it.
- Bring the top right corner to the bottom left and unfold it.
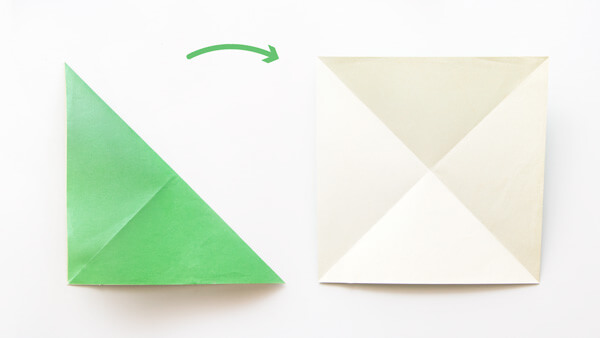
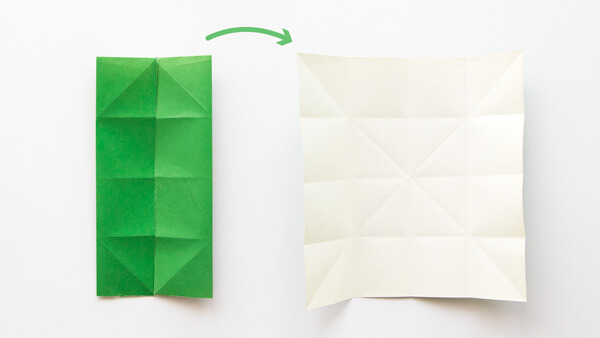
- Fold the top of the square down to the bottom and unfold it.
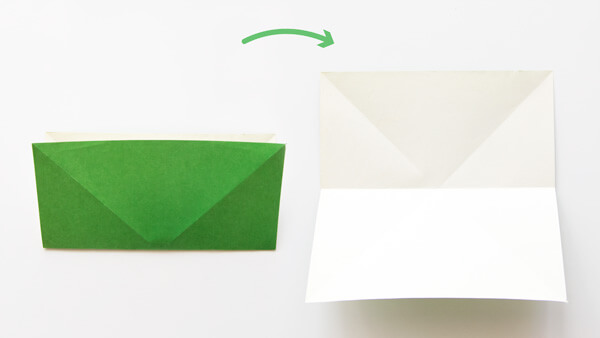
- Bring the top and the bottom of the square to the middle. Use the crease made in step 4 as a reference. Unfold it.
- Bring the right side of the square to the left and unfold it.
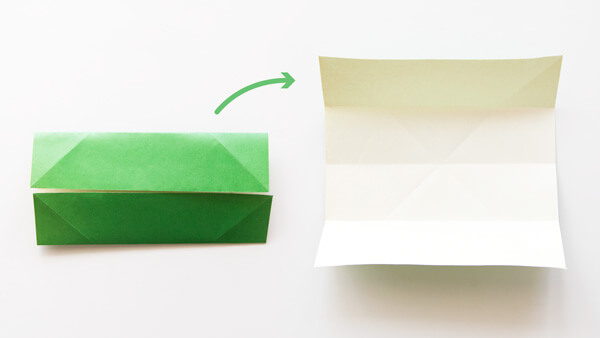
- Now, fold the right and left sides to the center using the crease made in step 6 as a reference. Unfold the square.
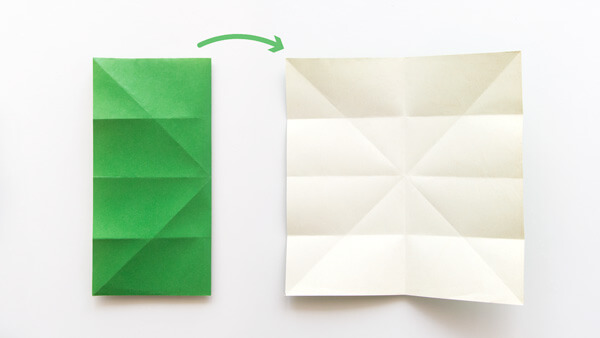
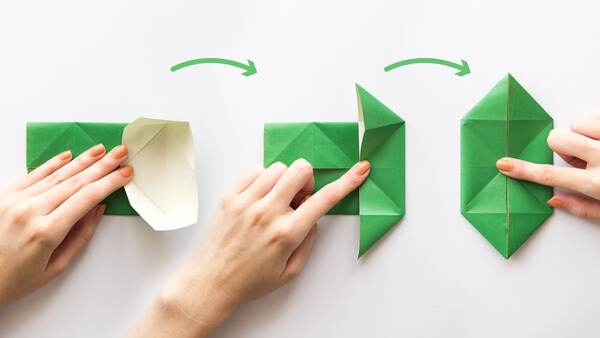
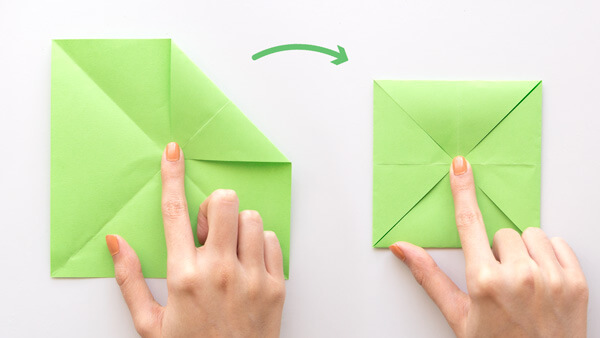
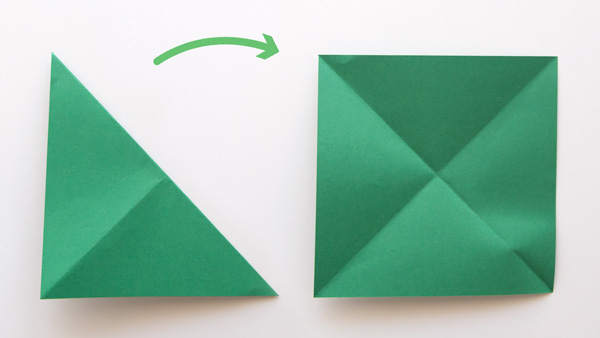
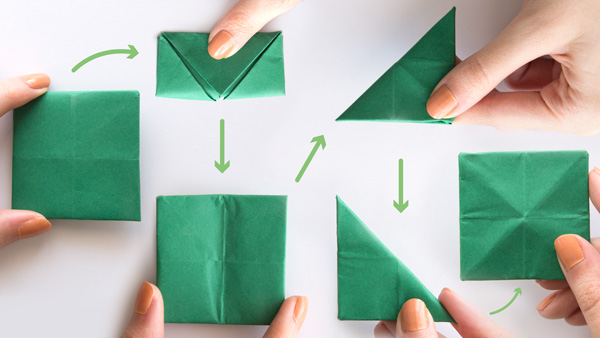
- Turn the paper over and fold each corner to the center.
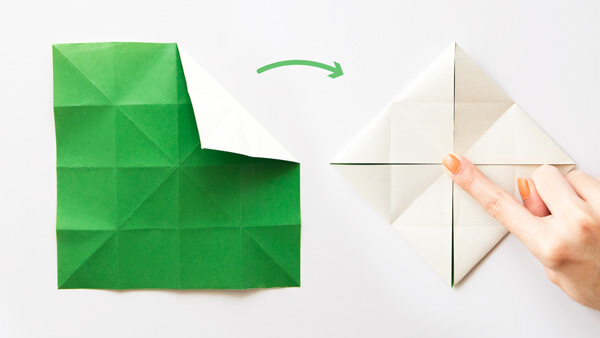
- Unfold the square and flip it over.
- Again, fold the top and bottom of the square to the center.
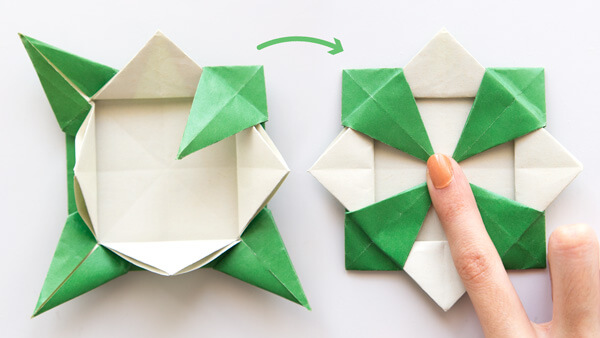
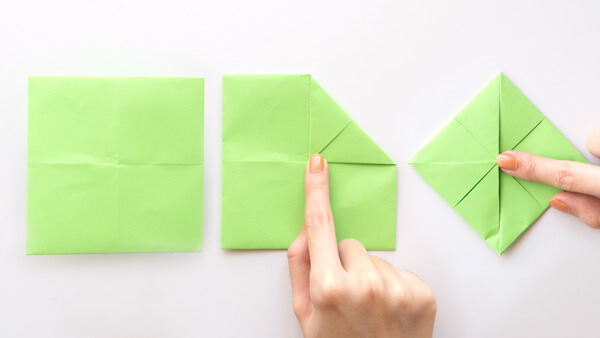
- Make a squash fold on each side, as shown below.
- Make a squash fold on each corner, as shown in the picture.

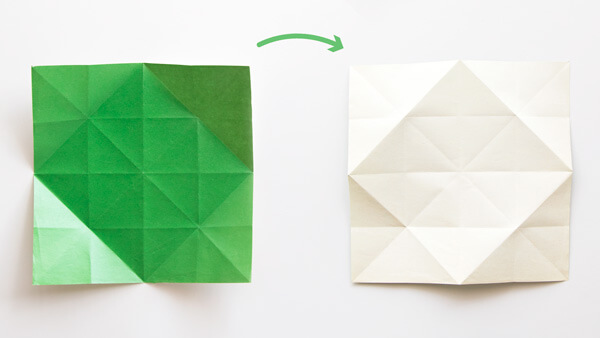
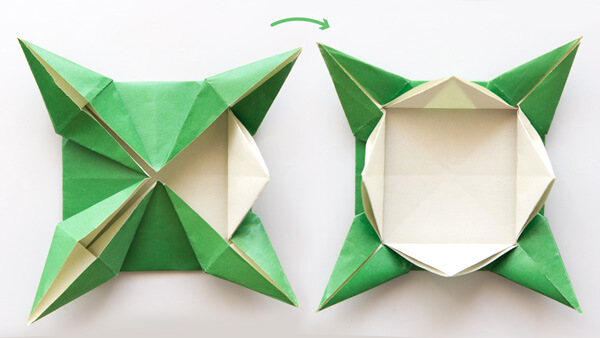
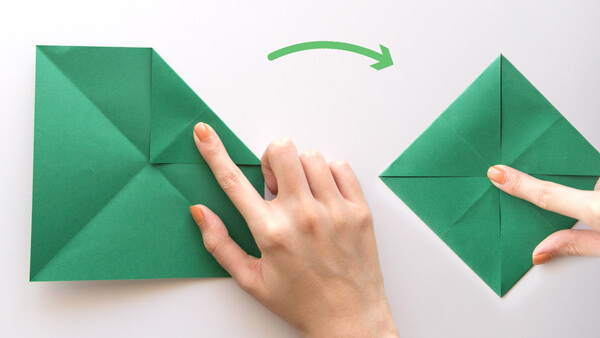
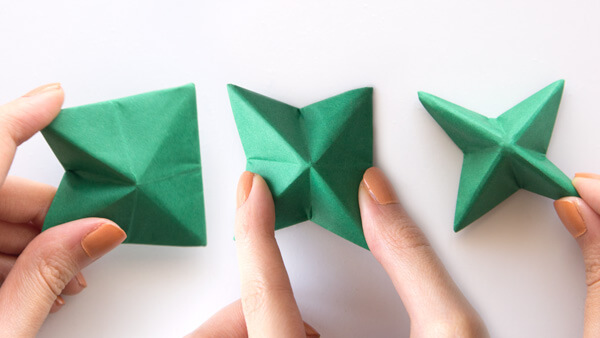
- You’ll end up with a big square containing 4 mini squares. Take the top layer of each mini square and fold the sides towards the middle (of each mini square). Then, take the corners (they will look like triangles) and fold them backward.
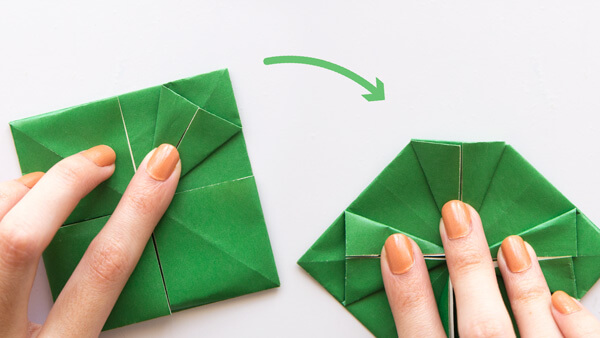
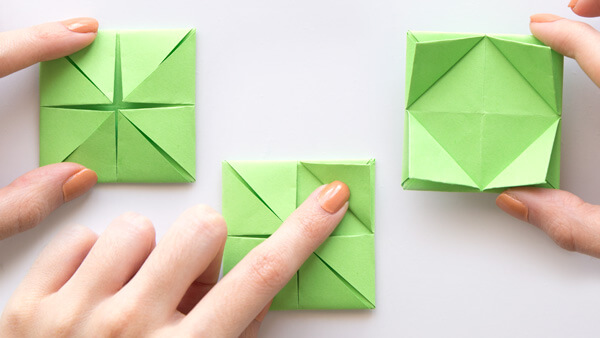
- Crease firmly and unfold everything you did in step 13.
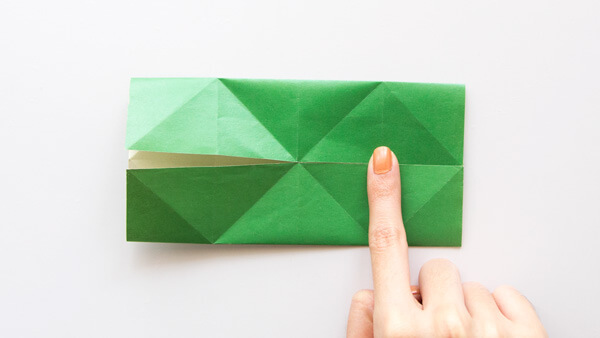
- It’s time to make a petal fold.
Focus on one mini square. Lift the top layer up, allowing it to collapse along the creases made earlier in step 13. You can see it in the picture below.
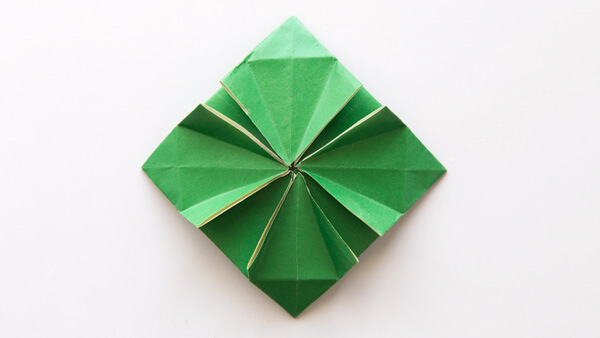
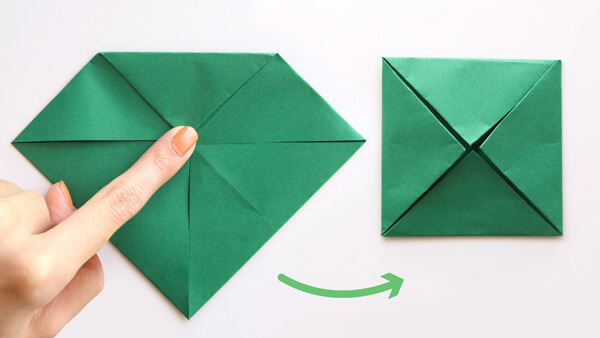
- Repeat the petal fold on the 3 other mini squares.
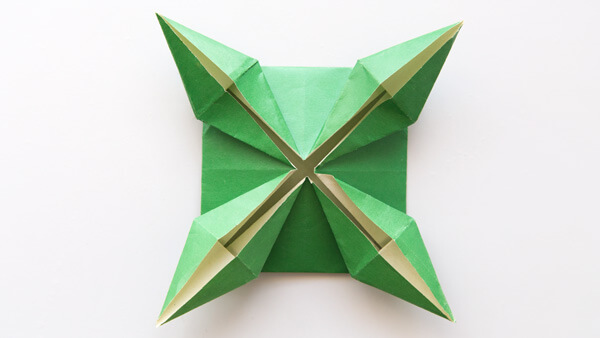
- Now you will have 4 corners in the center. Fold them outwards, as in the picture.
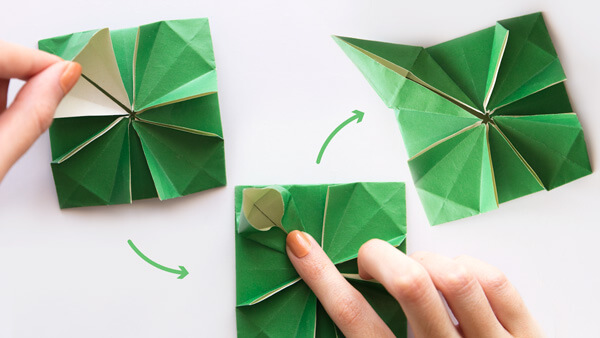
- Finally, fold the colored triangles to the center.
Module 2
- Fold the square diagonally to the left and unfold it.
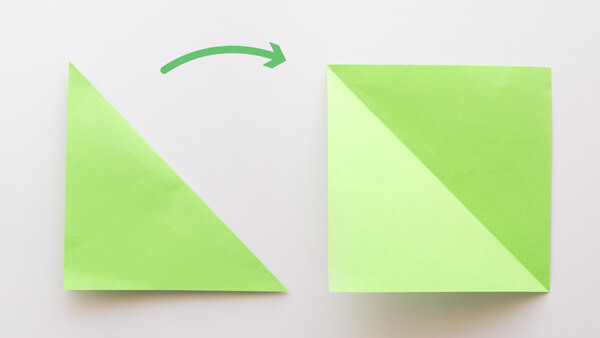
- Fold the square diagonally to the right and unfold it.
- Fold each corner of the square to the middle.
- Flip the square over and fold each corner to the center.
- Again, flip over the square and fold each corner to the center for the third time.

- Flip the square over one last time and fold each corner from the middle out.
Module 3
- Fold the bottom right corner to the top left corner and unfold it.
- Fold the top right corner to the bottom left corner and unfold it.
- Fold each corner of the square to the center.
- Again, fold each corner to the center.
- For the third time, fold each corner of the square to the middle.
- Flip your square over and fold it horizontally. Unfold it and fold it vertically. Unfold it and fold it diagonally. Unfold it and leave it as a square.
This step is only to accentuate the folds and make the next step easier.
- Push each side of the square to the center to create an X shape.
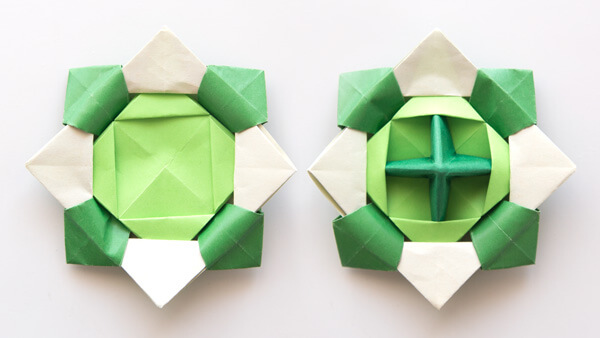
Assembly
- Insert each corner of module 2 into the pockets of module 1.
- Insert the edges of module 3 under the pockets in module 2.
- Start spinning!
How to Fold an Origami Spinning Top – Video Tutorial
Need more details? Here is a video where I show you how to fold this spinning top.
Origami Spinning Top Printable Instructions
This origami craft can be a little difficult to explain, especially if you’re working with multiple kids. That’s why I created these instructions that you can print and distribute to each child.
We also started an origami binder where we store all the printable instructions to make different models. If your child is an origami enthusiast, you can encourage him/her to start a binder too!
Click the link below to get your free printable spinning top instructions.
DOWNLOAD THE SPINNING TOP INSTRUCTIONS
Get your kids to make their own spinning tops and show us on Instagram by tagging @theprintablesfairy.
*Please remember that these printables are for personal use only. You may not sell or distribute the files. If you want to share them, please link to this post and not directly to the PDF files.
More Origami Toys
These are amazing!!! They look like they are flat on the bottom yet it isn’t. It looks so satisfying.
hi people I finished 2 of them 😀
That’s awesome! I hope you had fun making them.
It’s so easy! So satisfying. I’m definitely doing this again!
I’m glad you enjoyed making these easy spinning tops 🙂
I know right it’s easy and cool